Knowledge Base
Install/Upgrade
Installation Steps - Windows
Installation Steps - Mac
Mac Additional Settings
Upgrading SlidesClicker to new version
Setting SlidesClicker on Mac OS
Sometimes SlidesClicker requires additional permissions to work depending on how Privacy controls have been set up on your Mac. Follow steps below to set these additional permissions.
If you do not have SlidesClicker installed yet, Refer to this link for steps to install SlidesClicker on Mac. You can always download SlidesClicker from Download link.
Step 1
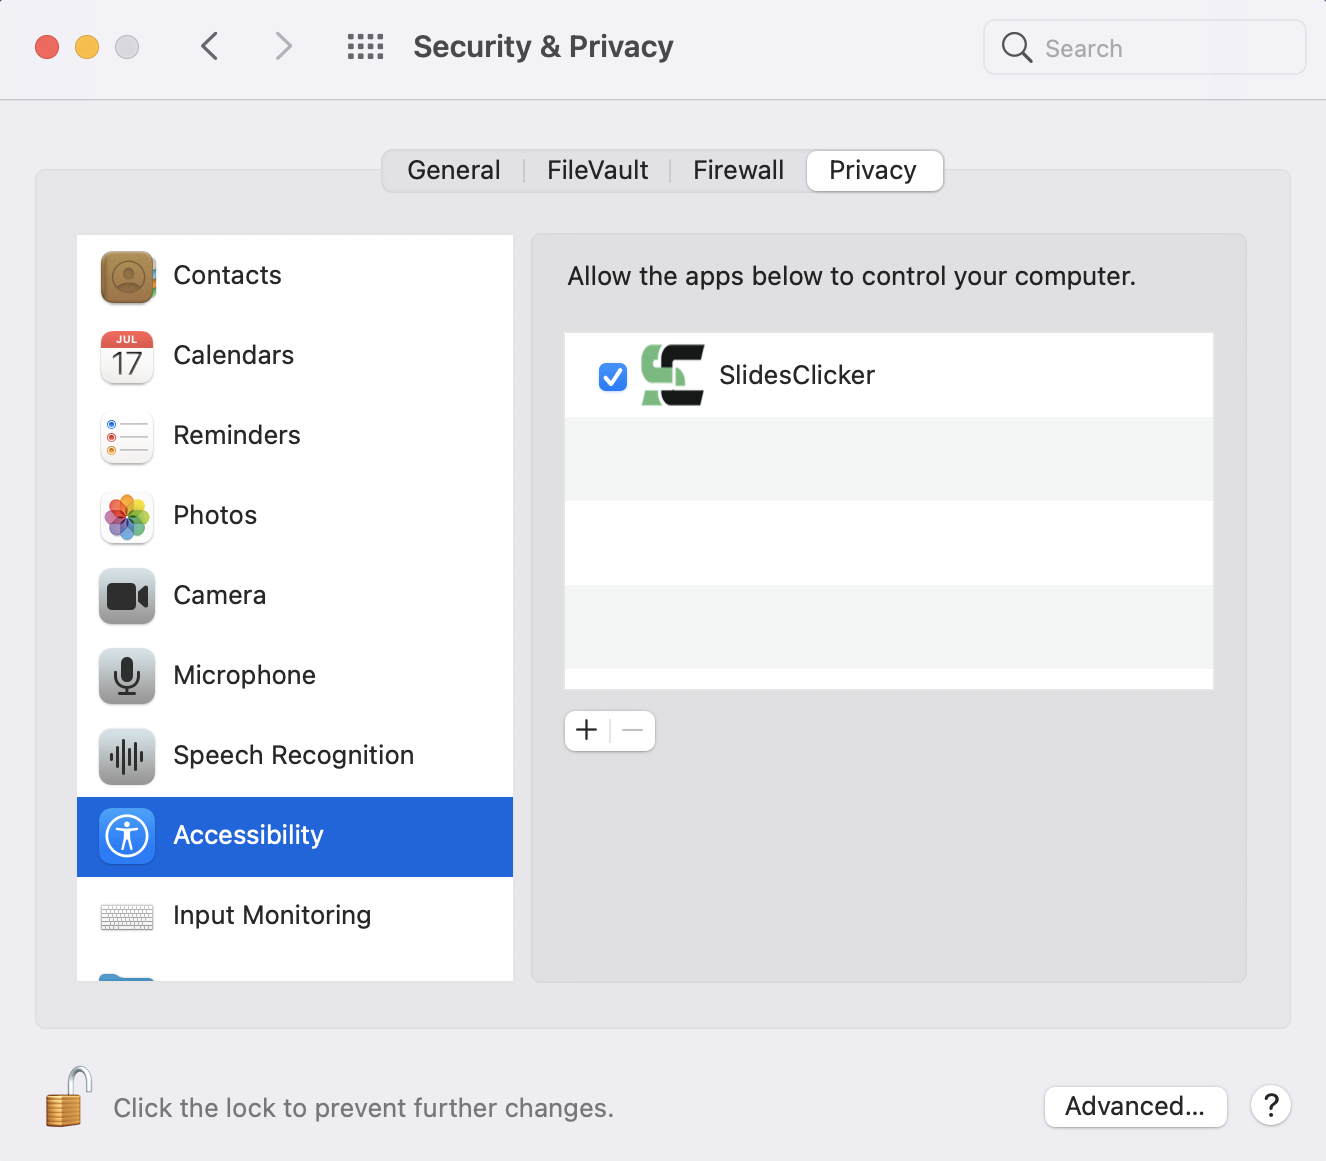
Set up Accessibility Permissions in Security & Privacy
When a third-party app tries to access and control your Mac through accessibility features, you receive an alert, and you must specifically grant the app access to your Mac in Security & Privacy preferences.You can do so by going to
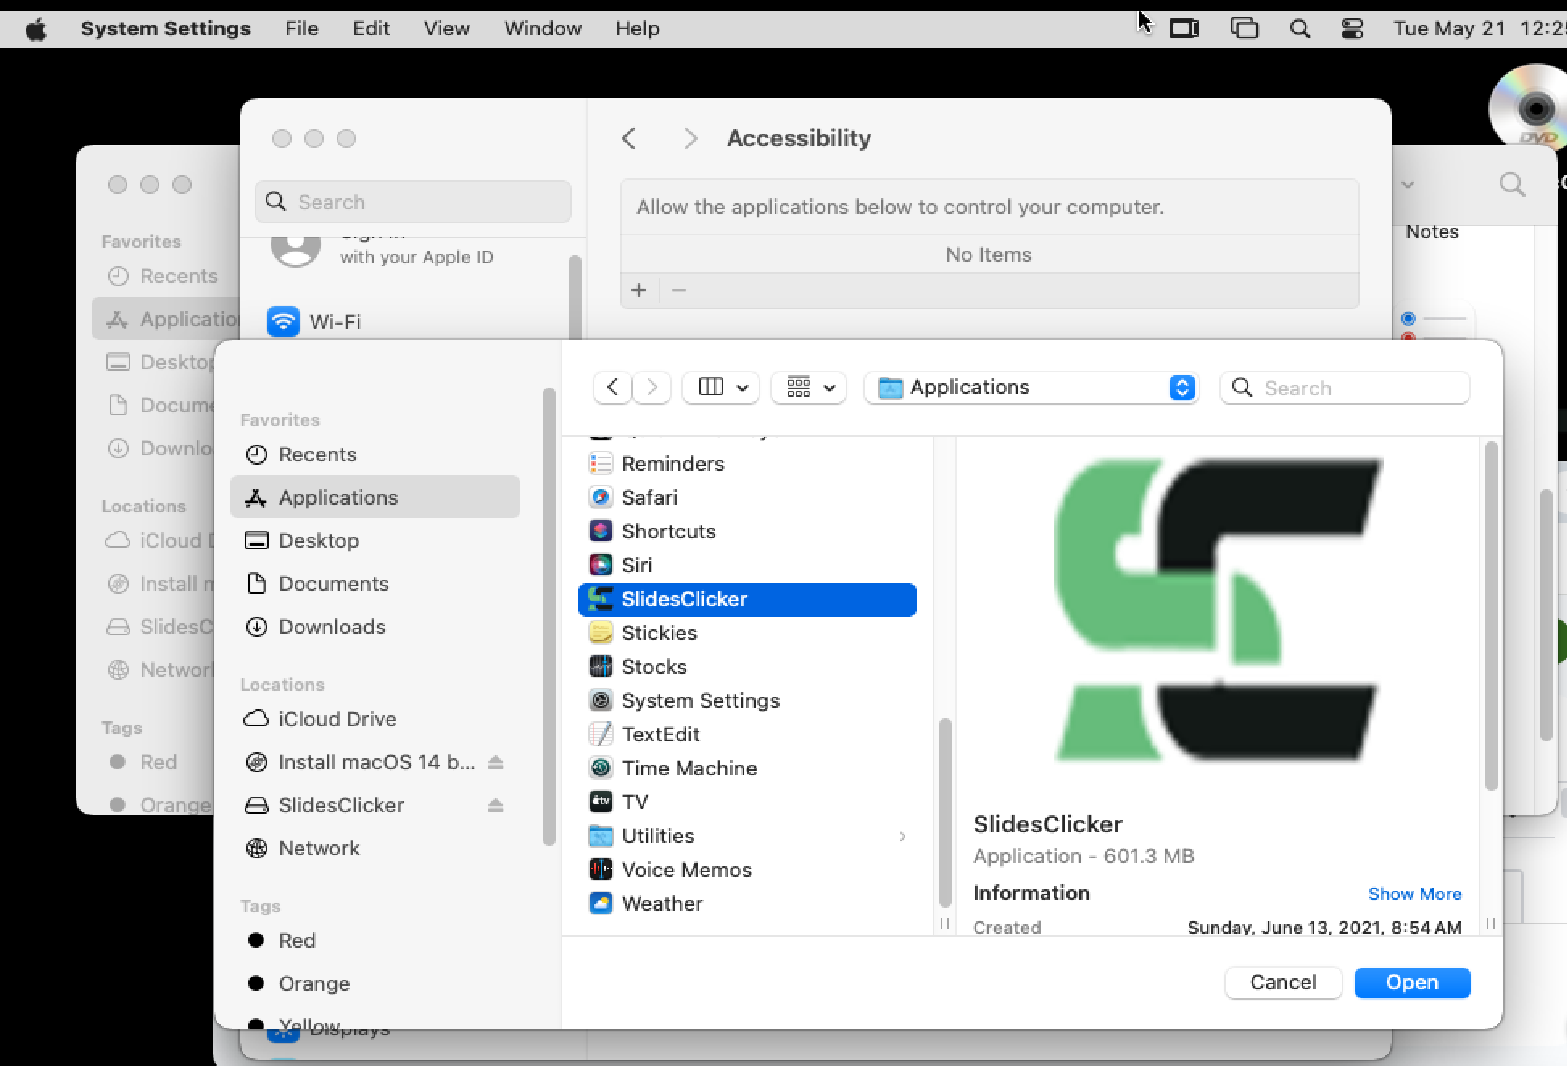
Apple menu > System Preferences > Security & Privacy > Privacy > Accessibility. If SlidesClicker is already listed in apps, click the checkbox, else click on + button and select SldiesClicker from Applications (where you installed SlidesClicker).
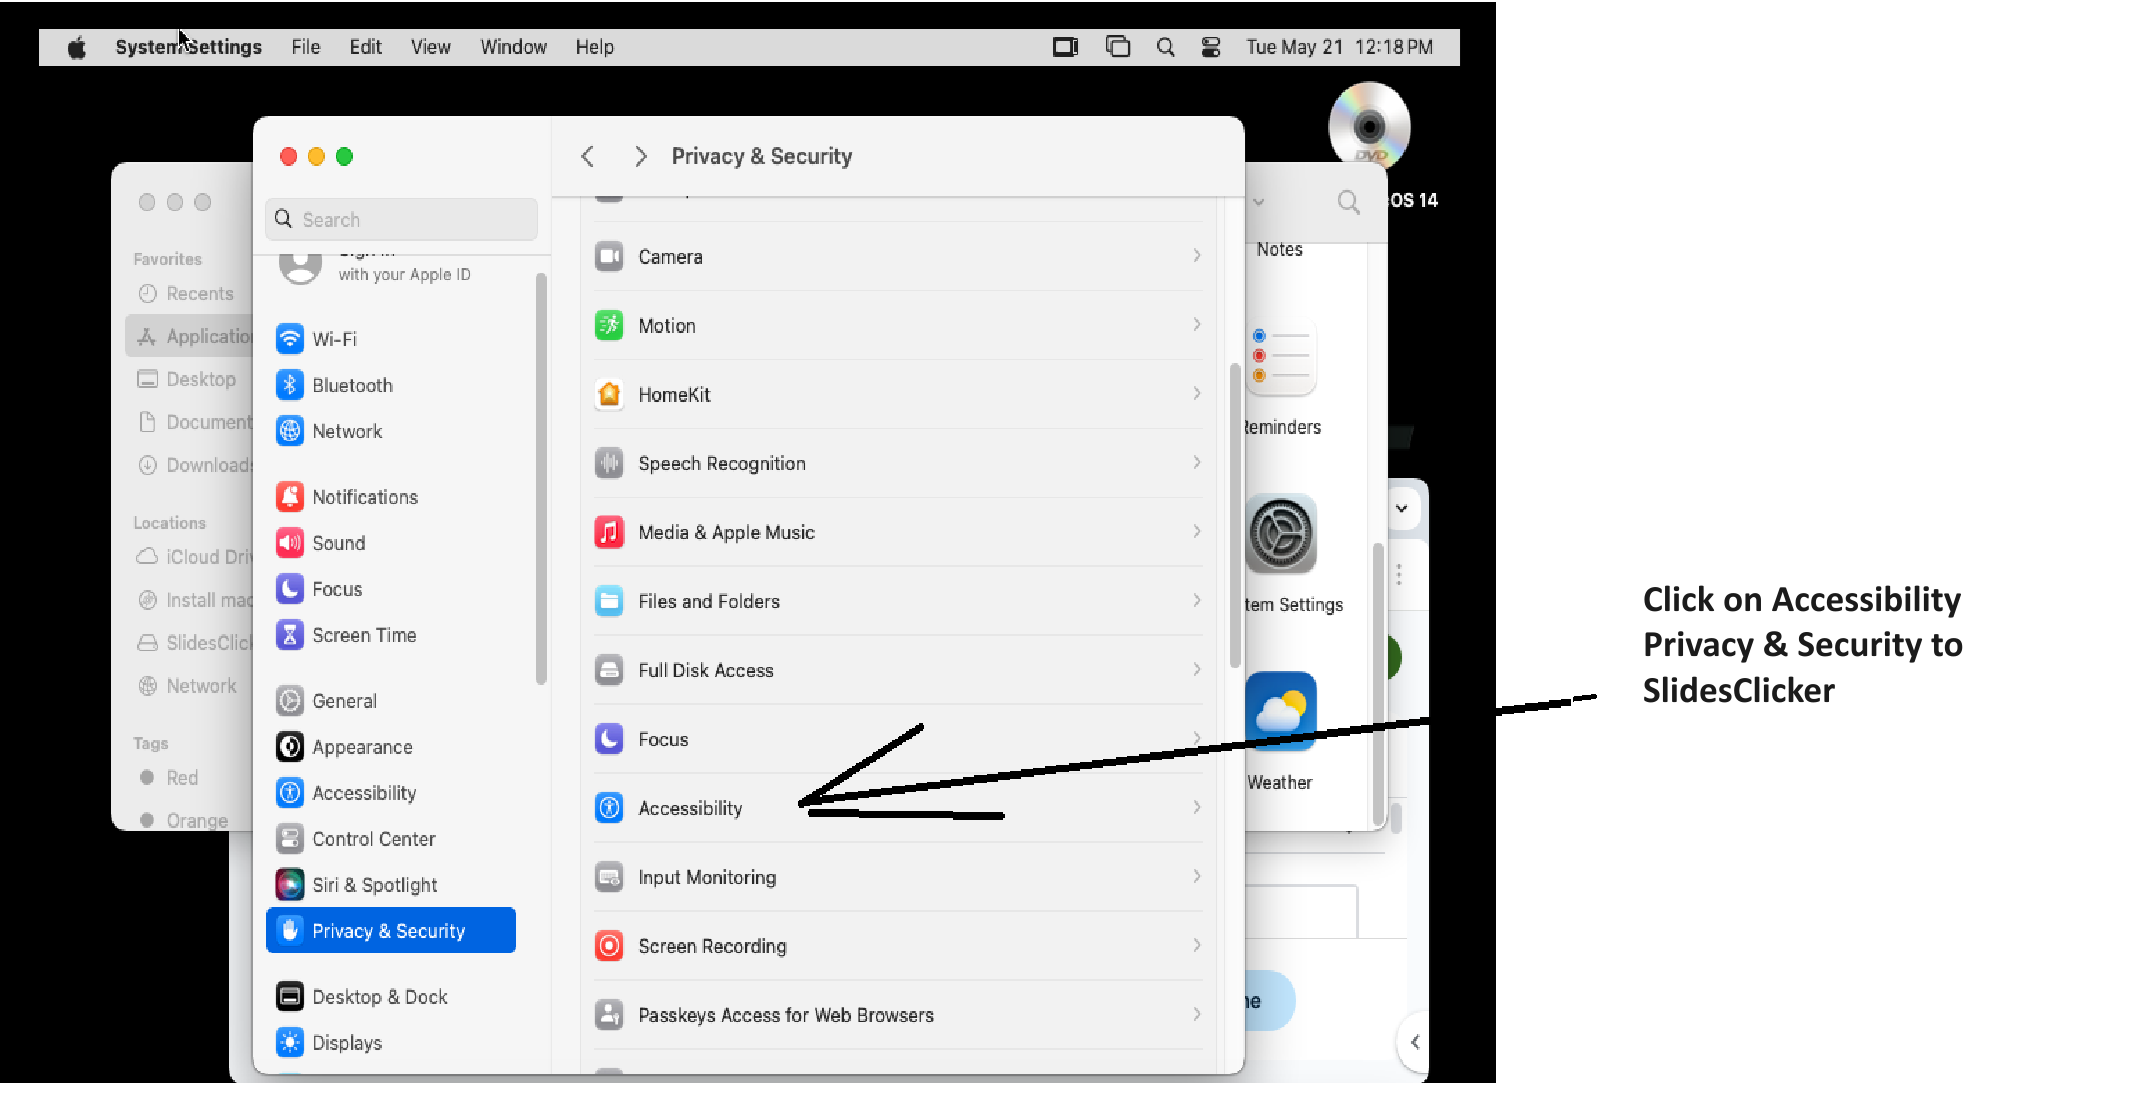
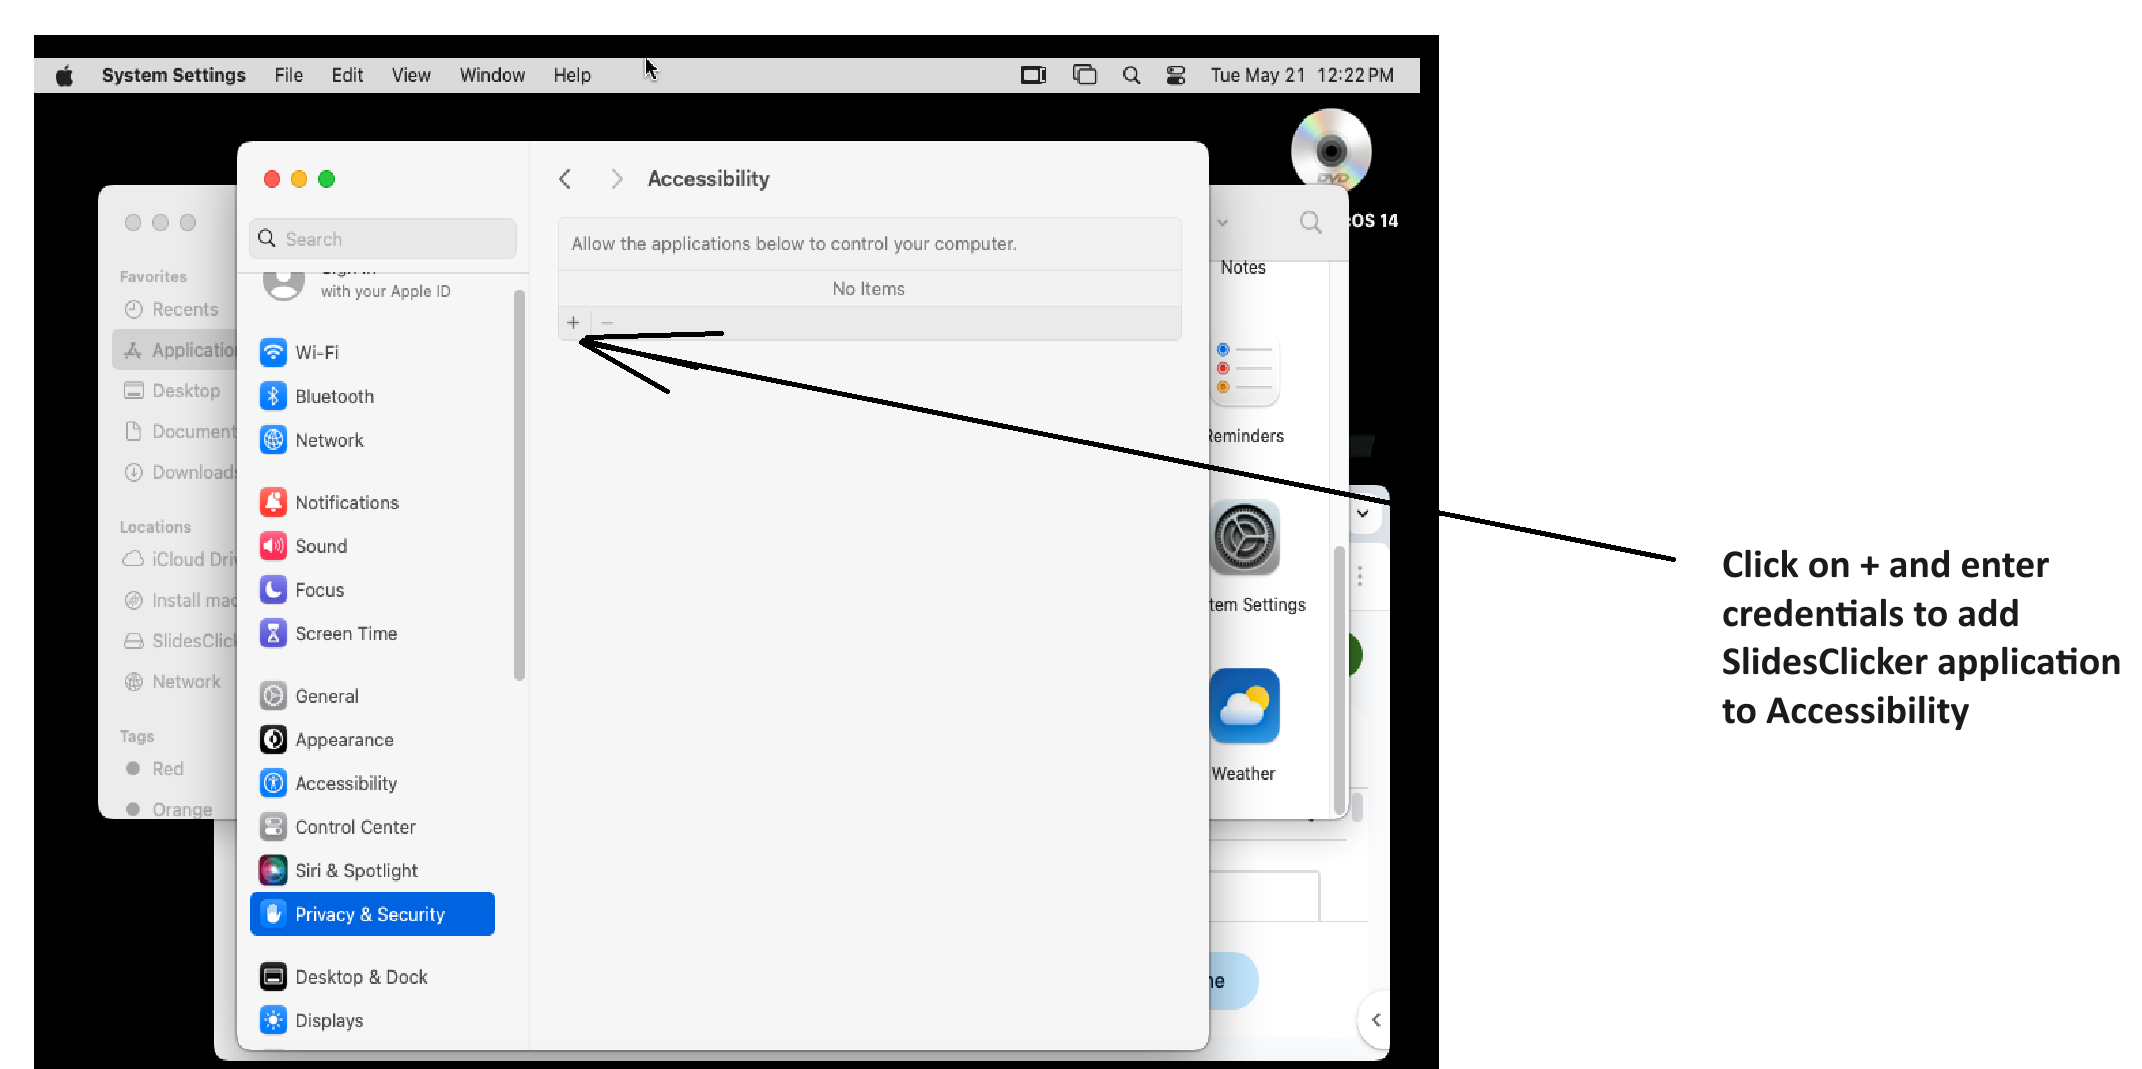
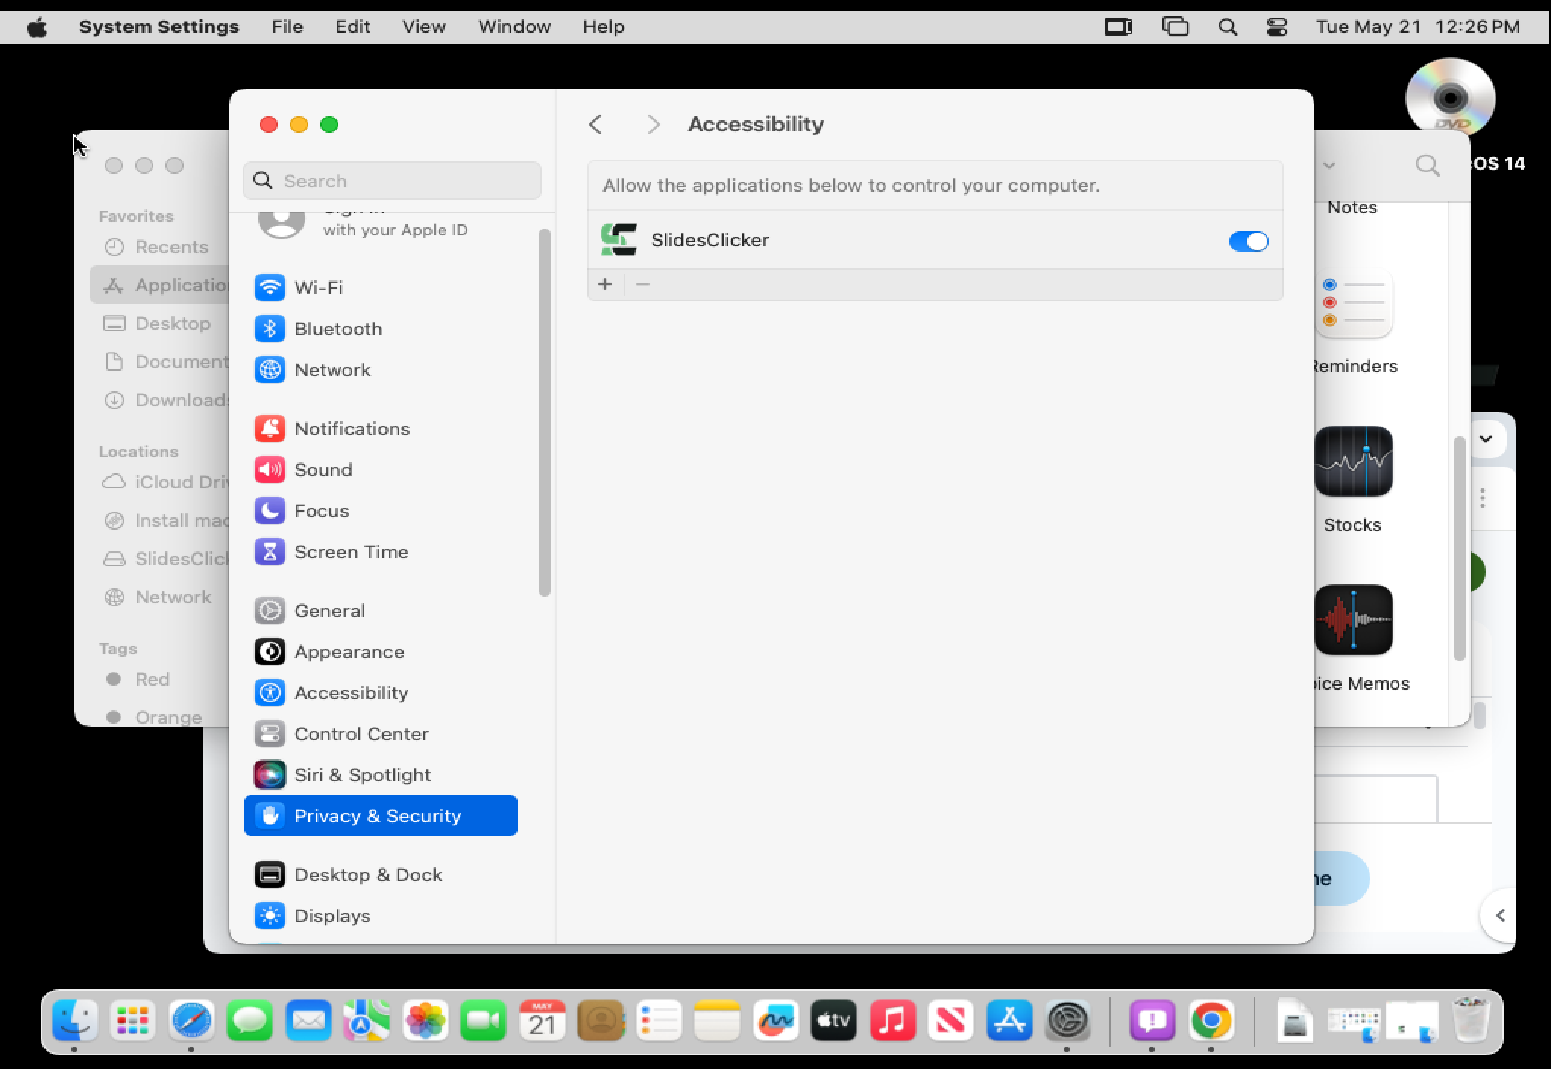
On new Mac OS like Mac 13 (Ventura) or 14 (Sonoma) Apple menu > System Settings > Privacy & Security > Accessibility and add SlidesClicker in list by clicking on + button. (See screens below).
On new Mac OS like Mac 13 (Ventura) or 14 (Sonoma), the screens will look like below:
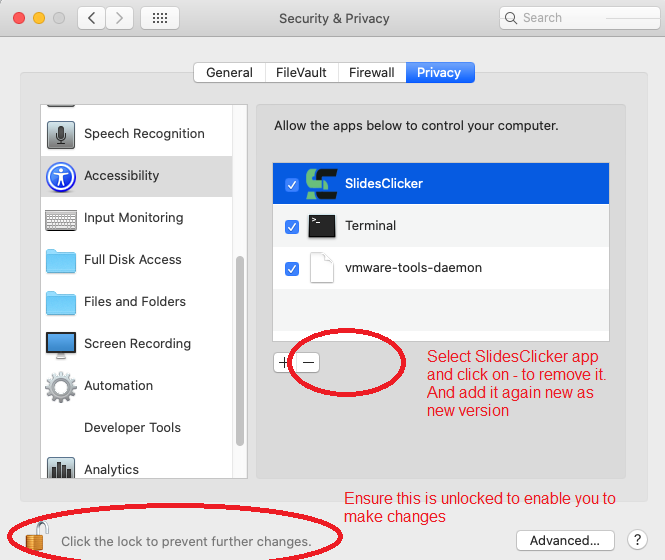
If you are upgrading to new version of Slidesclicker, you will need to remove older version and add new version into Accessibility Permissions as shown in this image.
Step 2
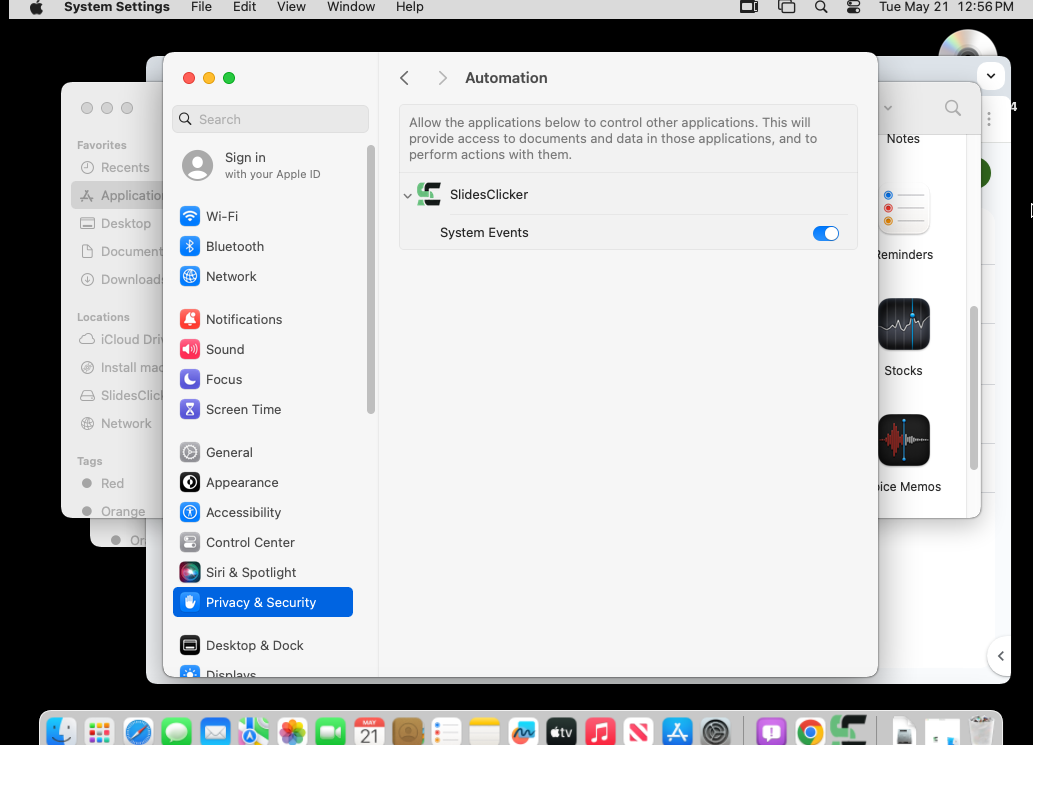
Set up Automation Permissions in Security & Privacy
Allow SlidesClicker to control your slides in slideshow mode. This permission is in Automation.You can do so by going to
Apple menu > System Preferences > Security & Privacy > Privacy > Automation. SlidesClicker should be listed in apps, click the checkbox for SystemEvents.
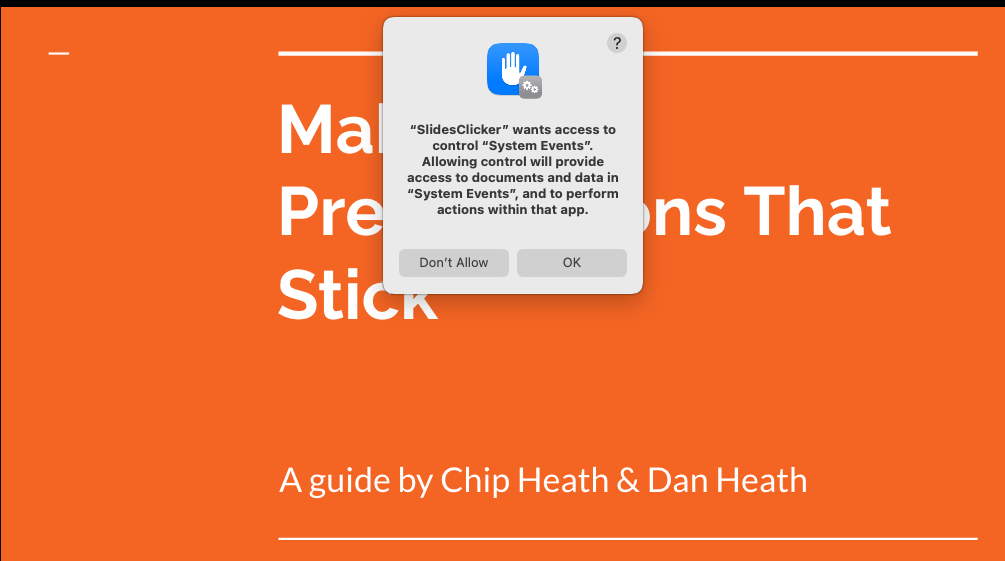
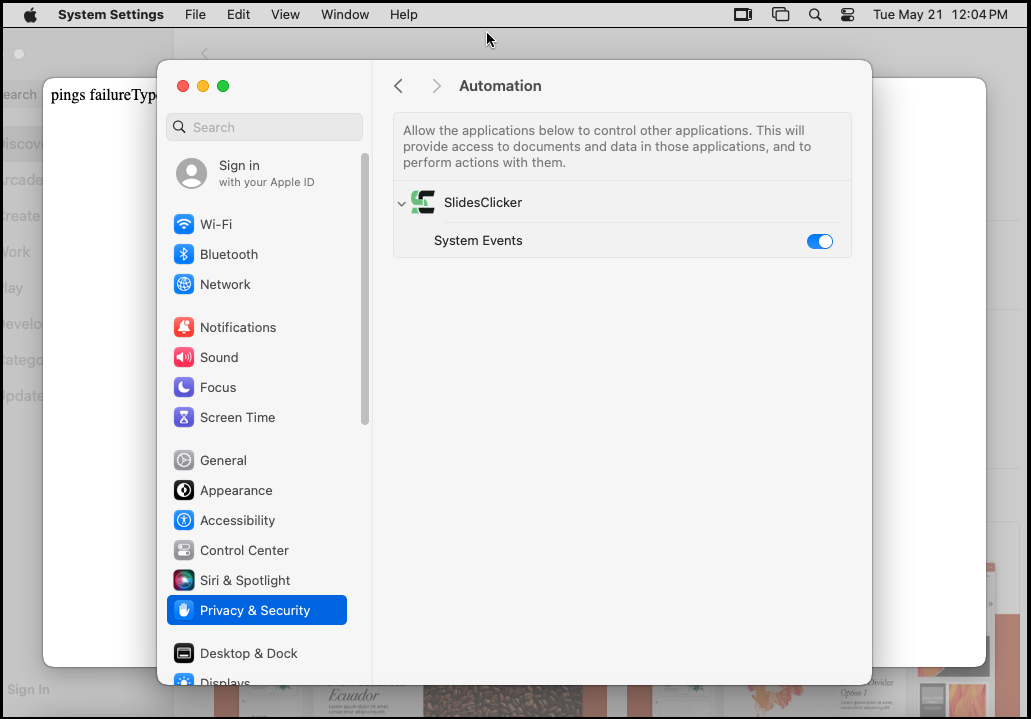
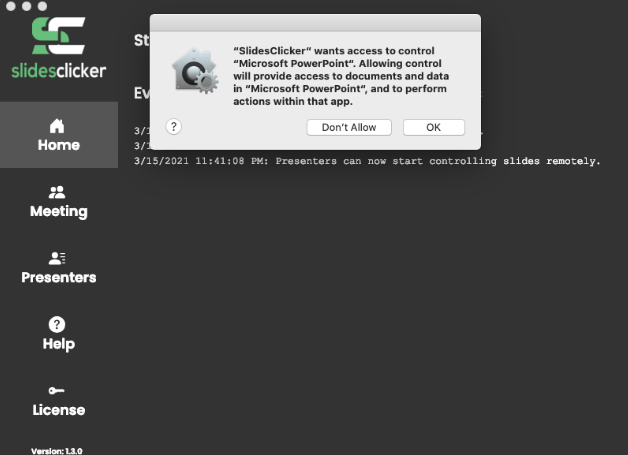
On new Mac OS like Mac 13 (Ventura) or 14 (Sonoma), easiest way to do this, by starting to share the slide deck and havng a user control the slide show, which will result in a popup and you can simply allow it first time which will make an entry for SlidesClicker into Automation (Apple menu > System Settings > Privacy & Security > Automation)
Step 3
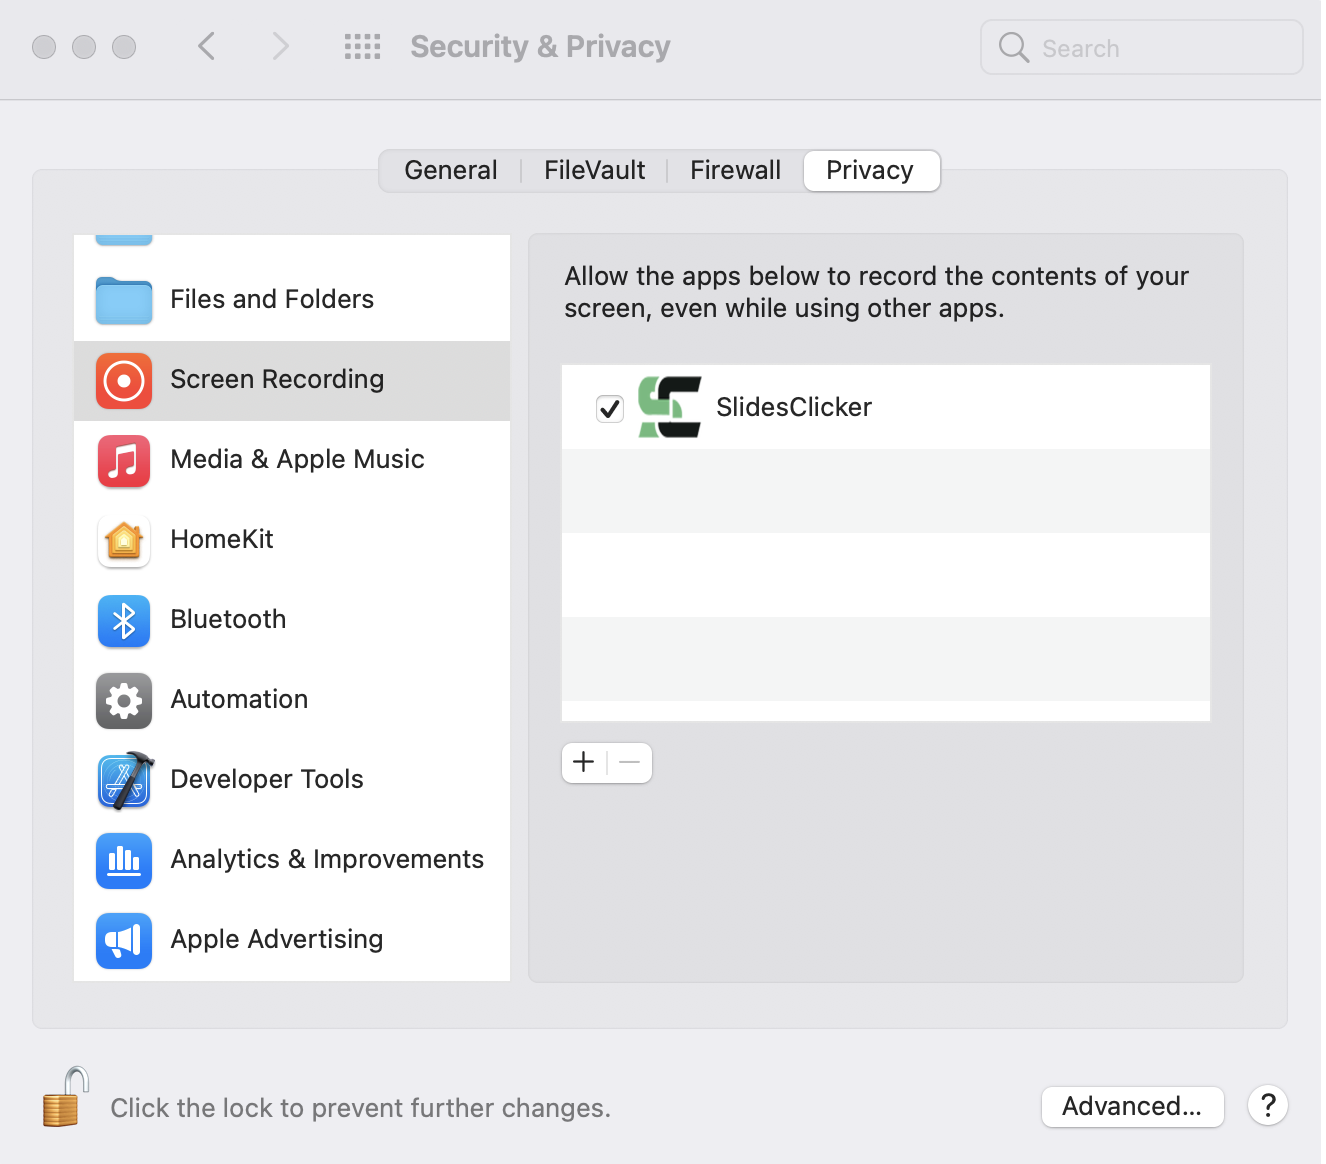
Set up Screen Recording Permissions in Security & Privacy (Only needed if you want to show slides to Presenters on Clicker)
Allow SlidesClicker to share your desktop screens with Presenters. You only neeed to enable this if you are going to enable "Show Slides Screenshots to Presenters" Option in Meetings tab.You can do so by going to
Apple menu > System Preferences > Security & Privacy > Privacy > Screen Recording. If SlidesClicker is already listed in apps, click the checkbox, else click on + button and select SldiesClicker from Applications (where you installed SlidesClicker).
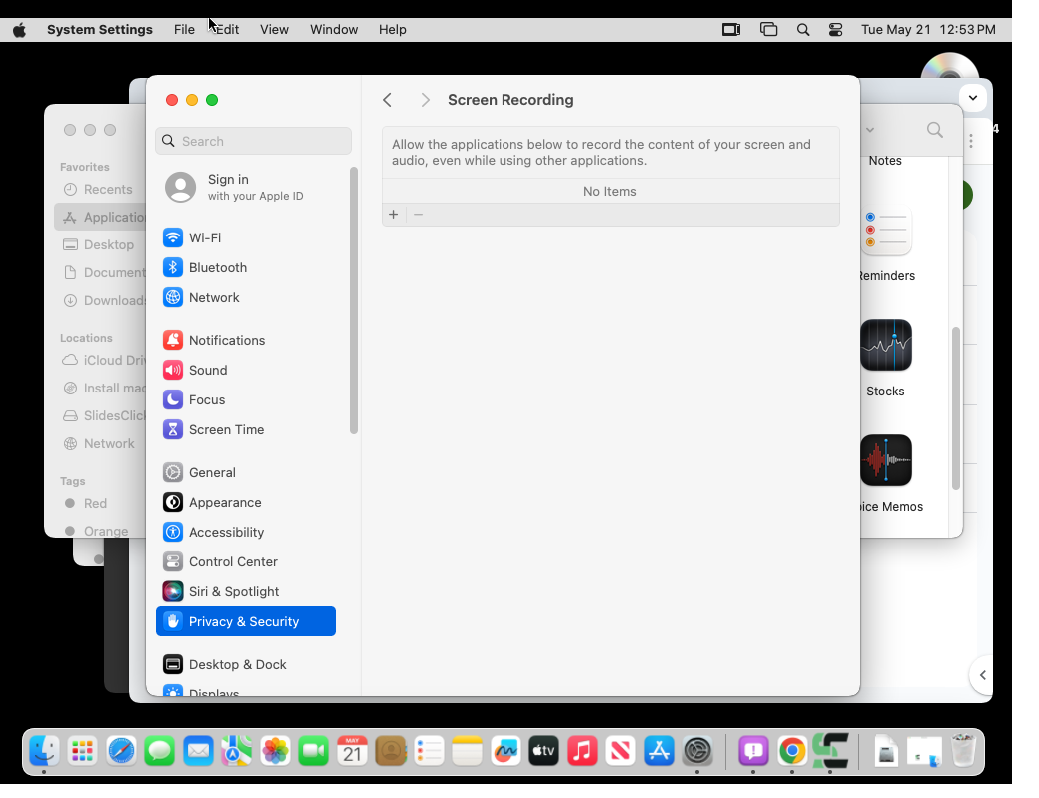
On new Mac OS like Mac 13 (Ventura) or 14 (Sonoma), make an entry in Screen Recording under Privacy & Security
Apple menu > System Settings > Privacy & Security > Screen Recording

Step 4
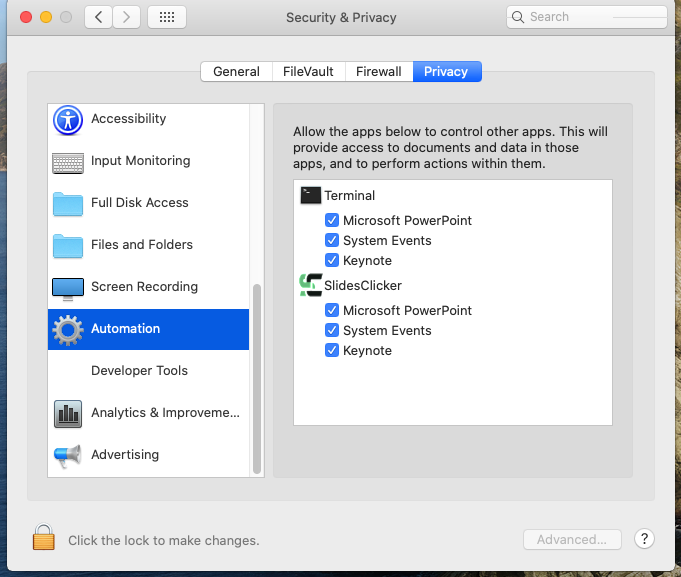
Allow Events in Automation Permissions From Powerpoint & Keynote
Allow SlidesClicker to get permission to Microsoft Powerpoint & Apple Keynote. This permission is in Automation.You can do so by going to
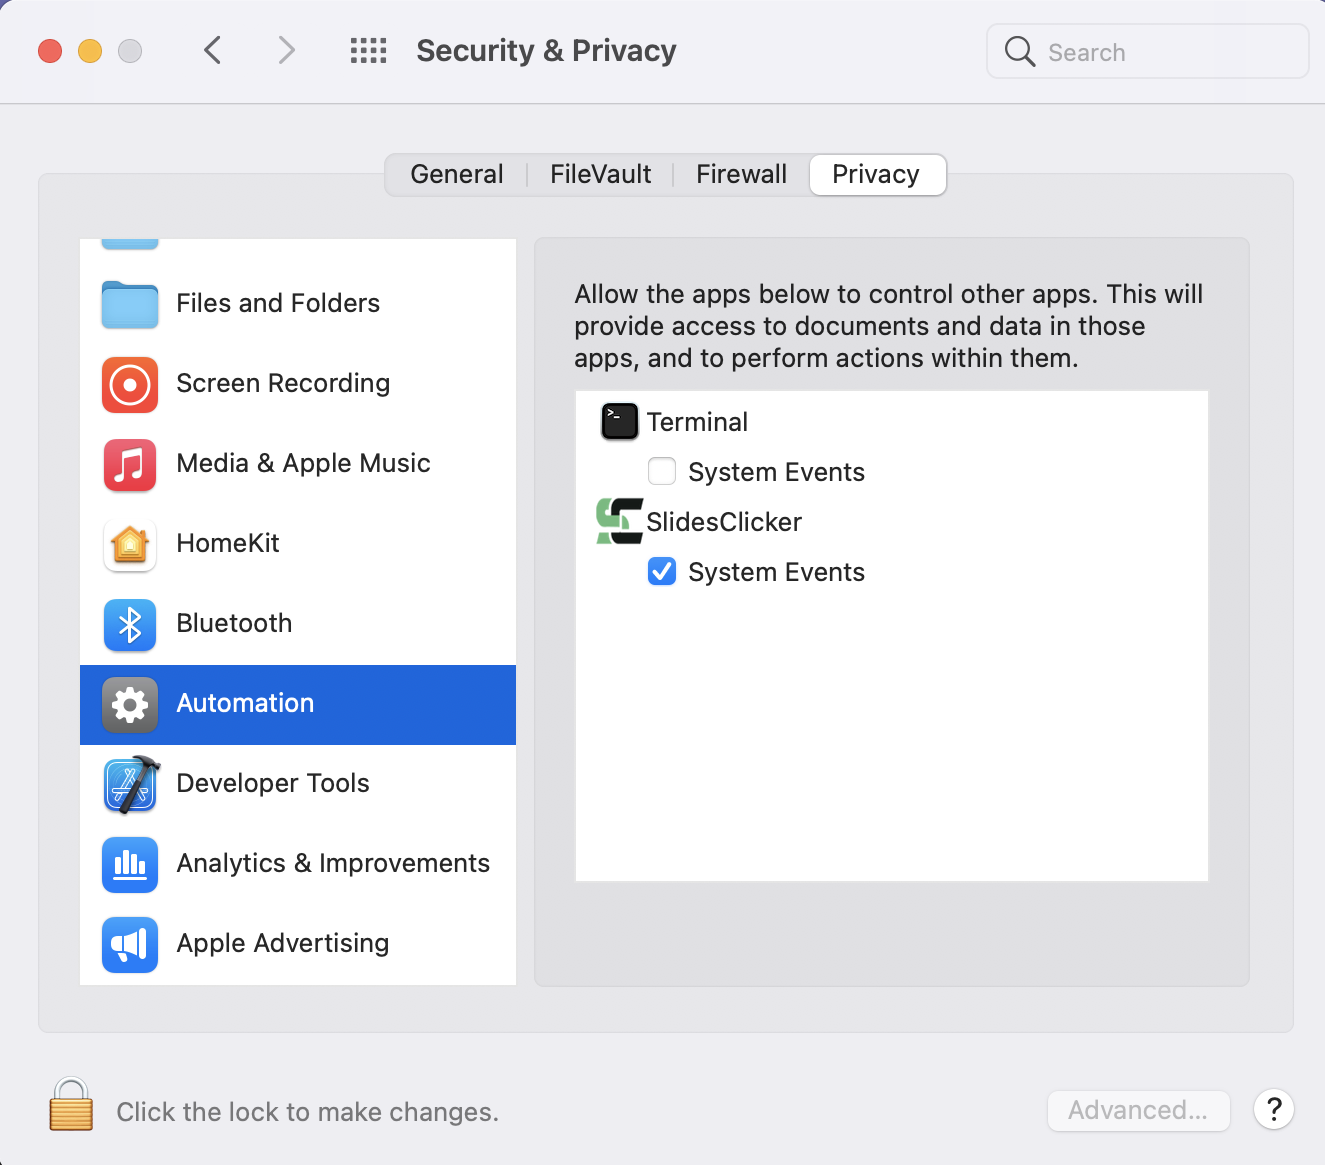
Apple menu > System Preferences > Security & Privacy > Privacy > Automation. SlidesClicker along with System Events, Microsoft Powerpoint & Keynote should be listed in apps as shown below.
On new Mac OS like Mac 13 (Ventura) or 14 (Sonoma), make sure events are allowed in Automation under Privacy & Security
Apple menu > System Settings > Privacy & Security > Automation