Knowledge Base
Install/Upgrade
Installation Steps - Windows
Installation Steps - Mac
Mac Additional Settings
Upgrading SlidesClicker to new version
Installation Steps - Mac
Step 1
Download the SlidesClicker dmg file
If you have not already, download SlidesClicker.Step 2
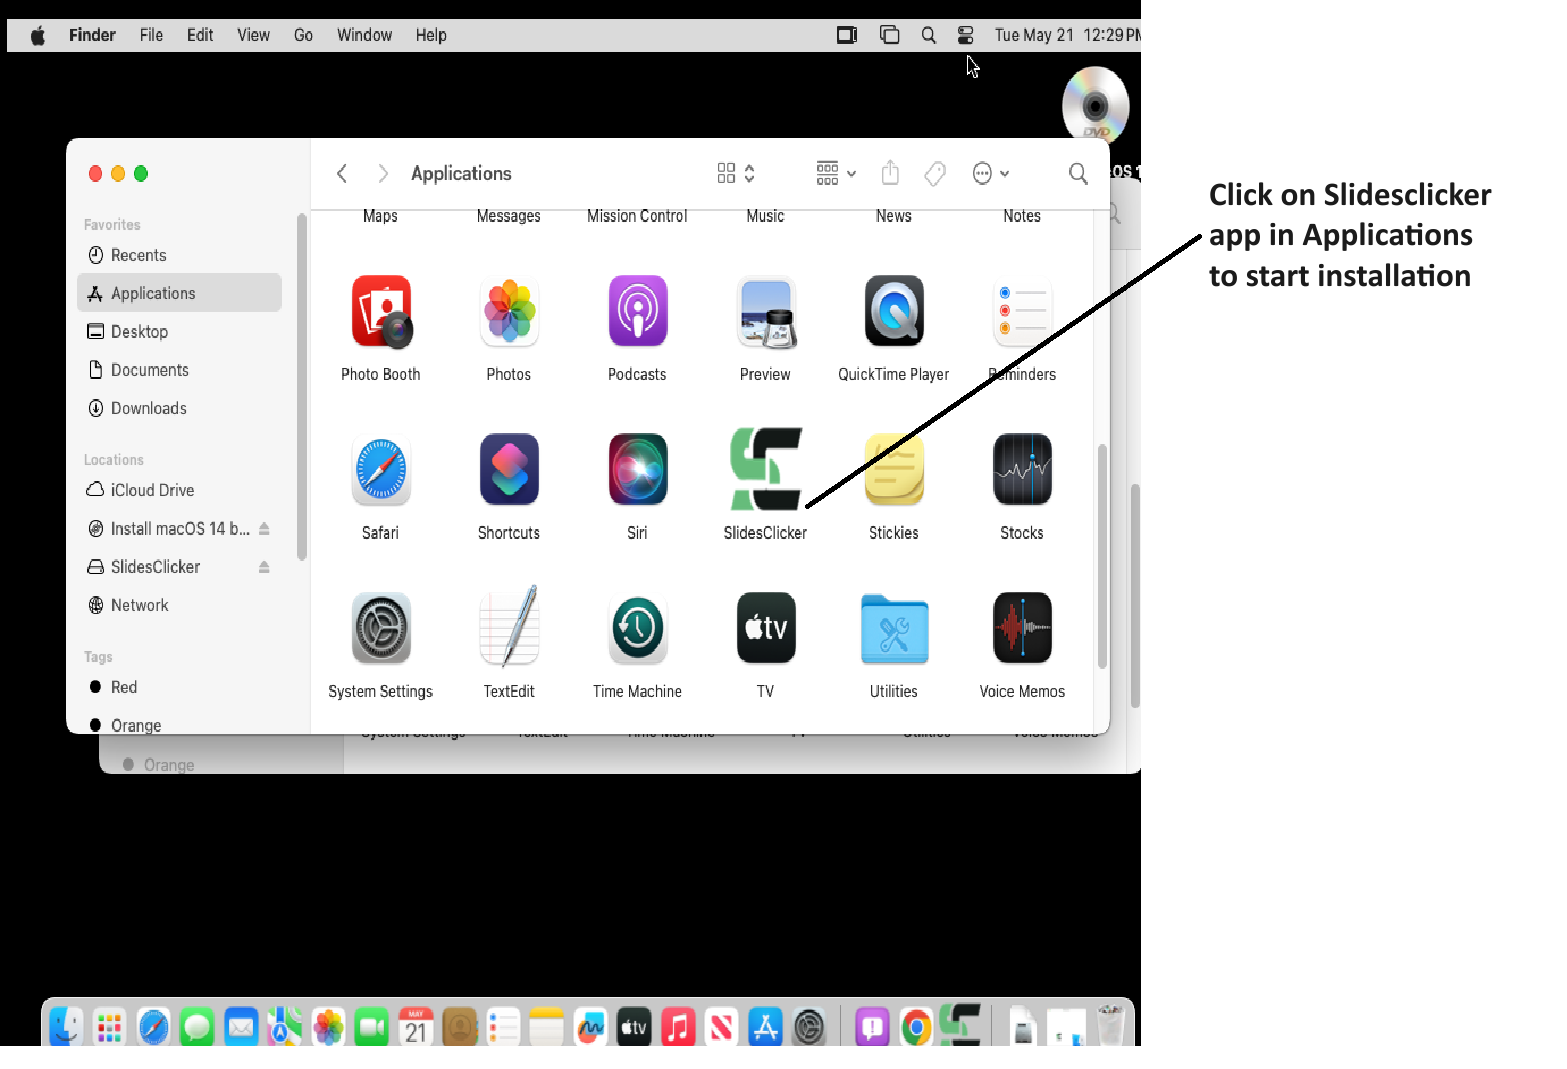
Start installation by double clicking on dmg file you downloaded.
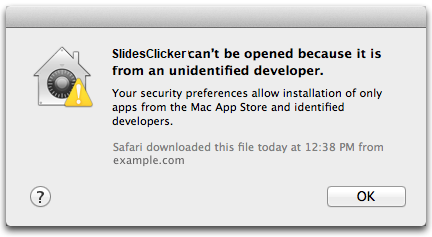
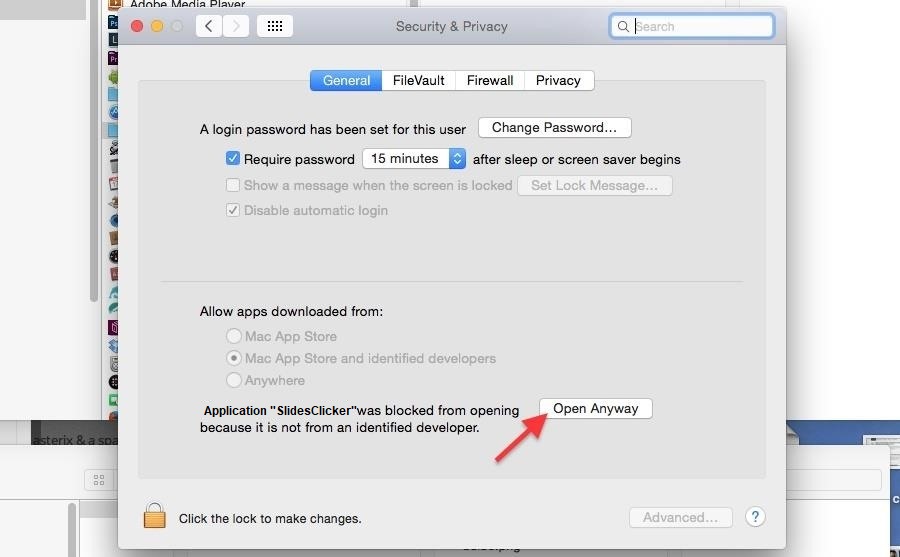
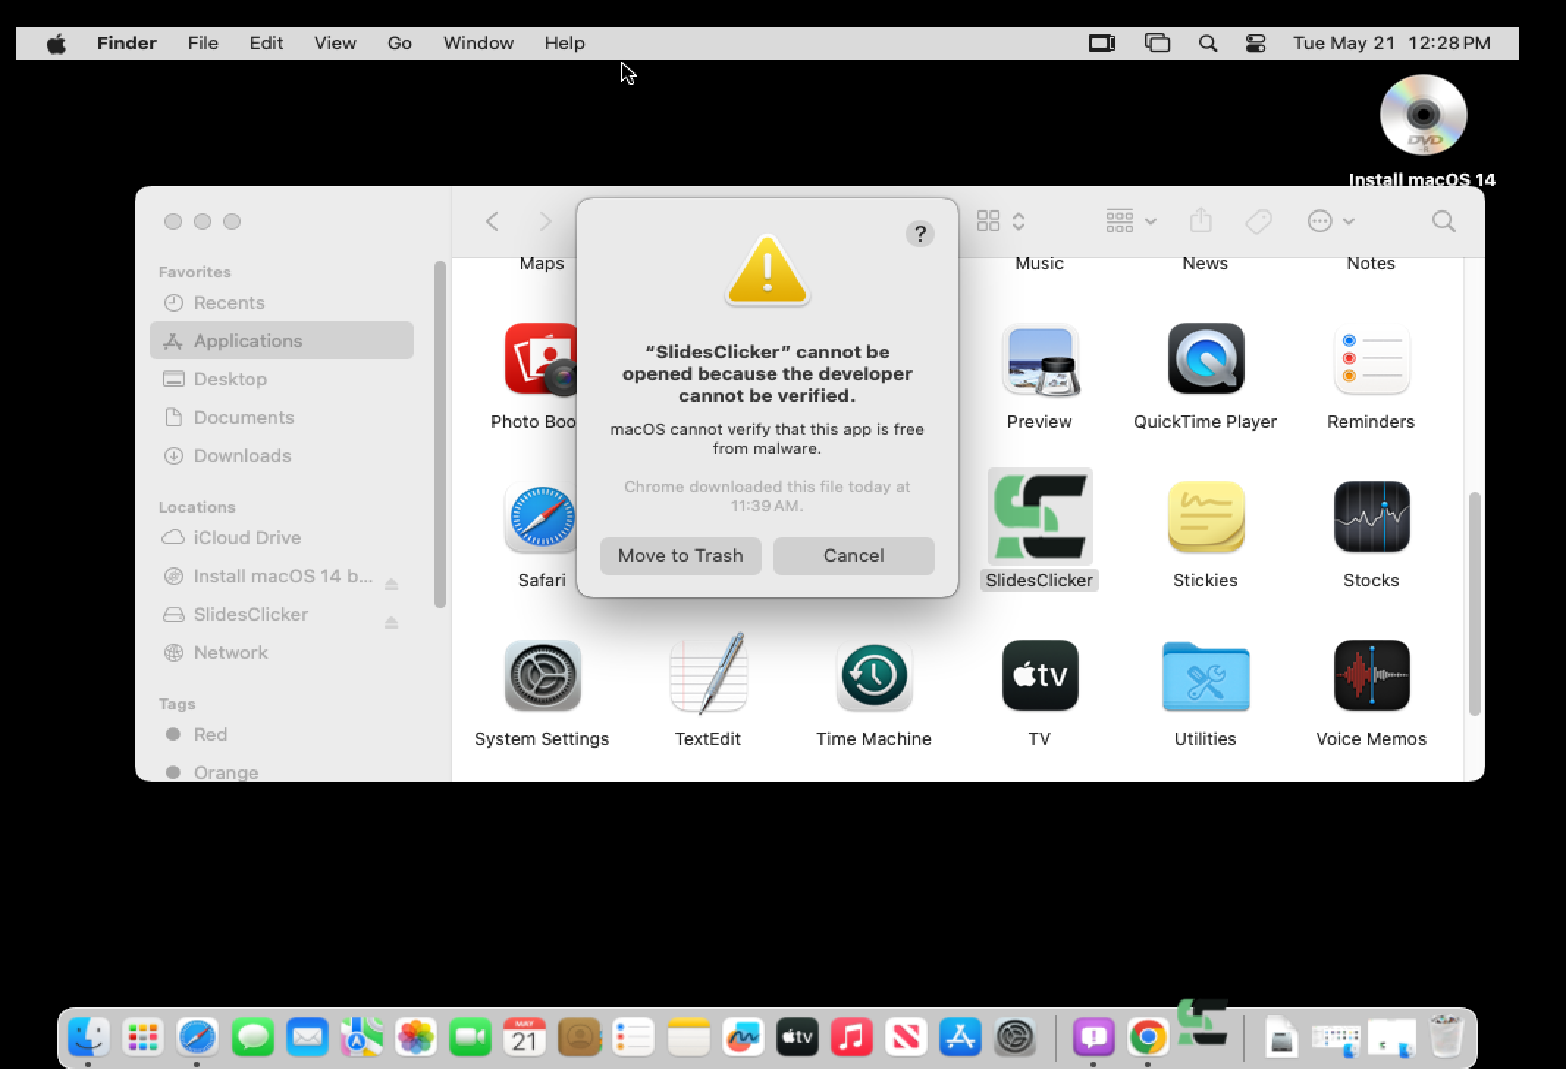
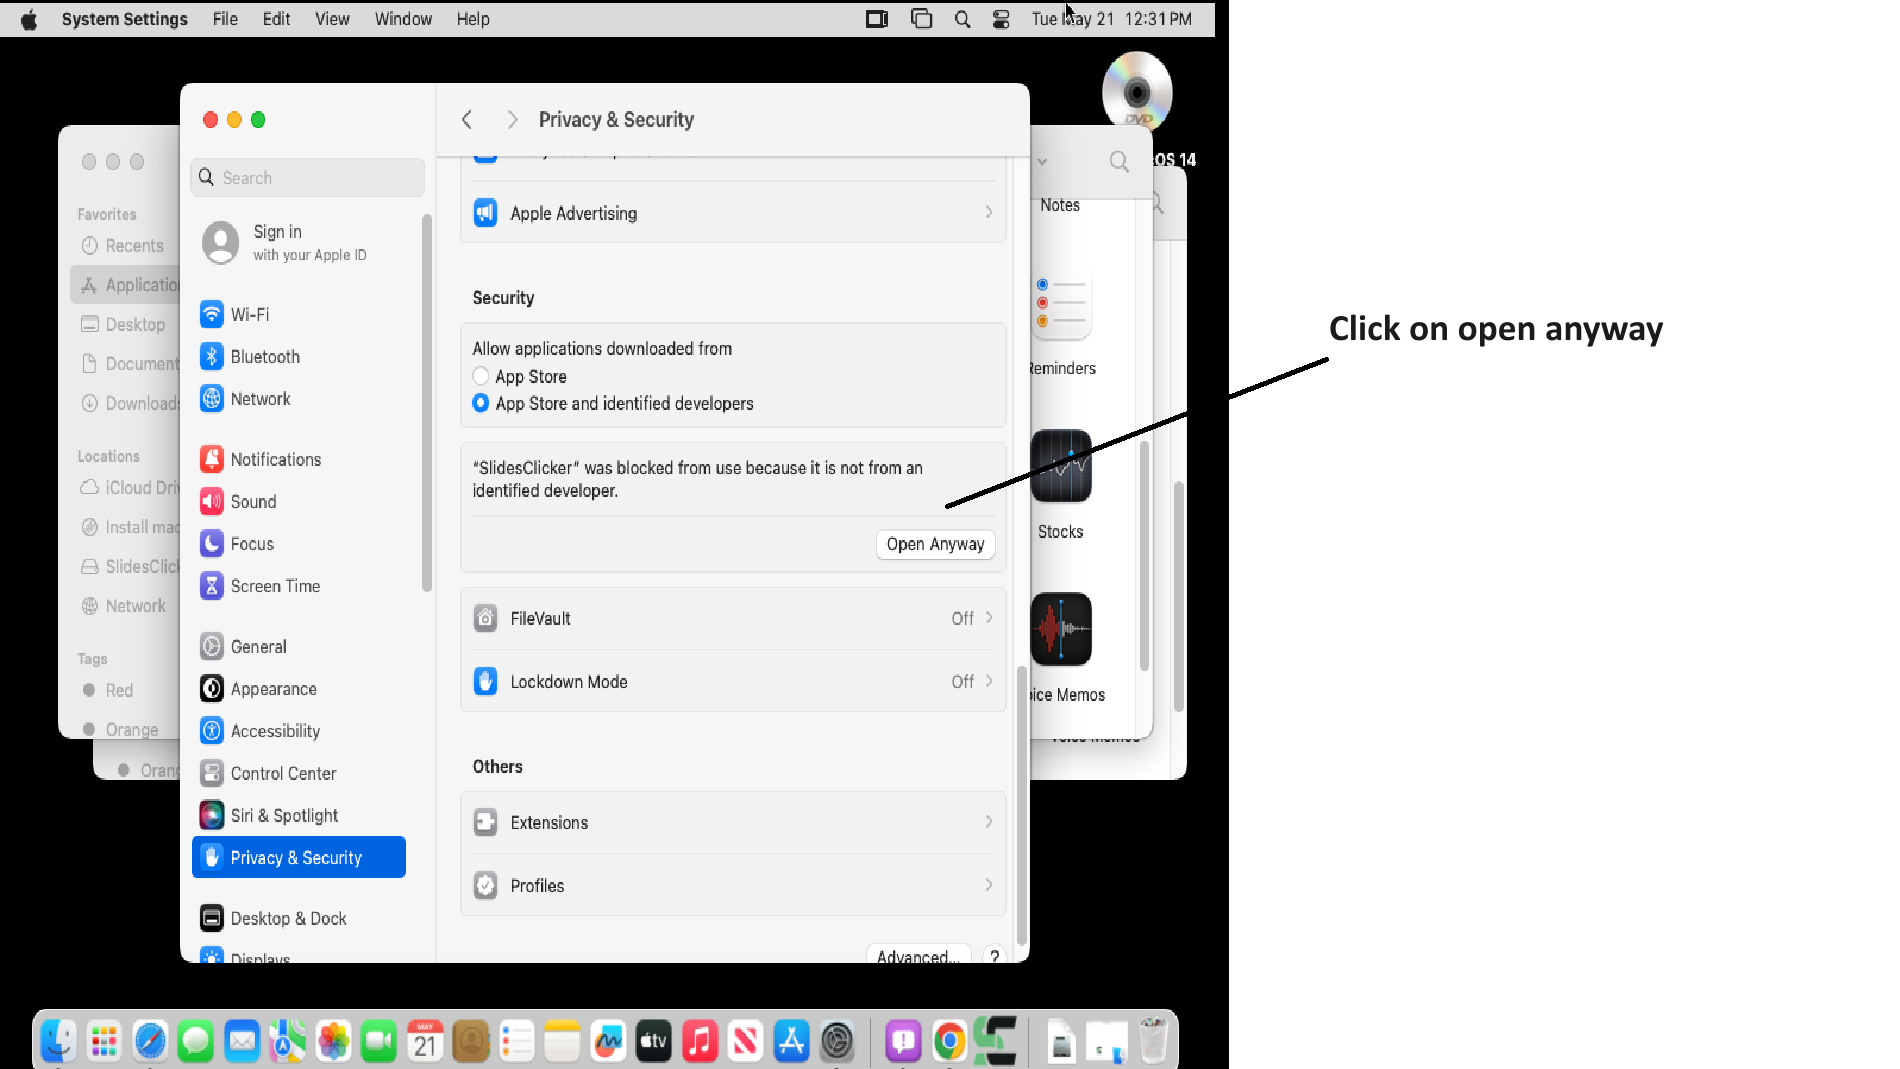
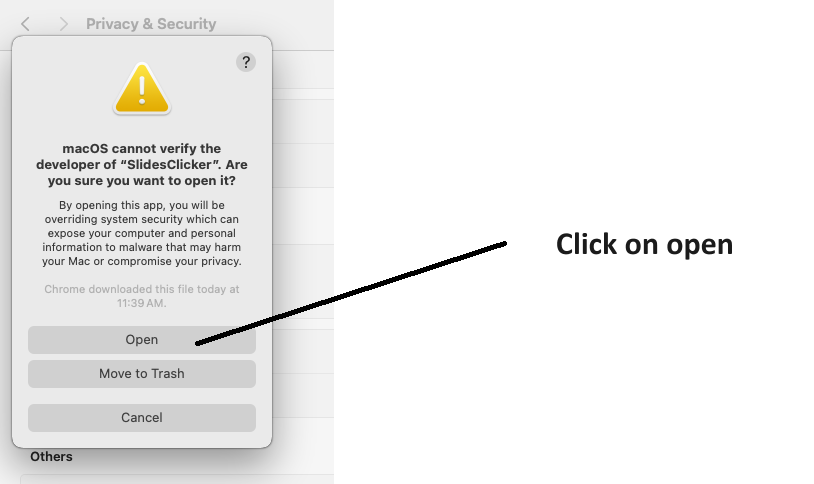
The dmg file will unpack to start the installation. In case the installation is blocked by a popup stating App is from an unidentified developer, you can close that and go toApple menu > System Preferences > Security & Privacy > General and click on "Open Anyway" button as shown below.
or On new Mac OS like Mac 13 (Ventura) or 14 (Sonoma)
Apple menu > System Settings > Privacy & Security and click on "Open Anyway" button as shown in screens below.
(make sure you copy SlidesClicker to Applications, so you can add it into Accessiblity list of apps).
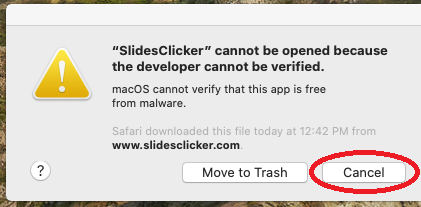
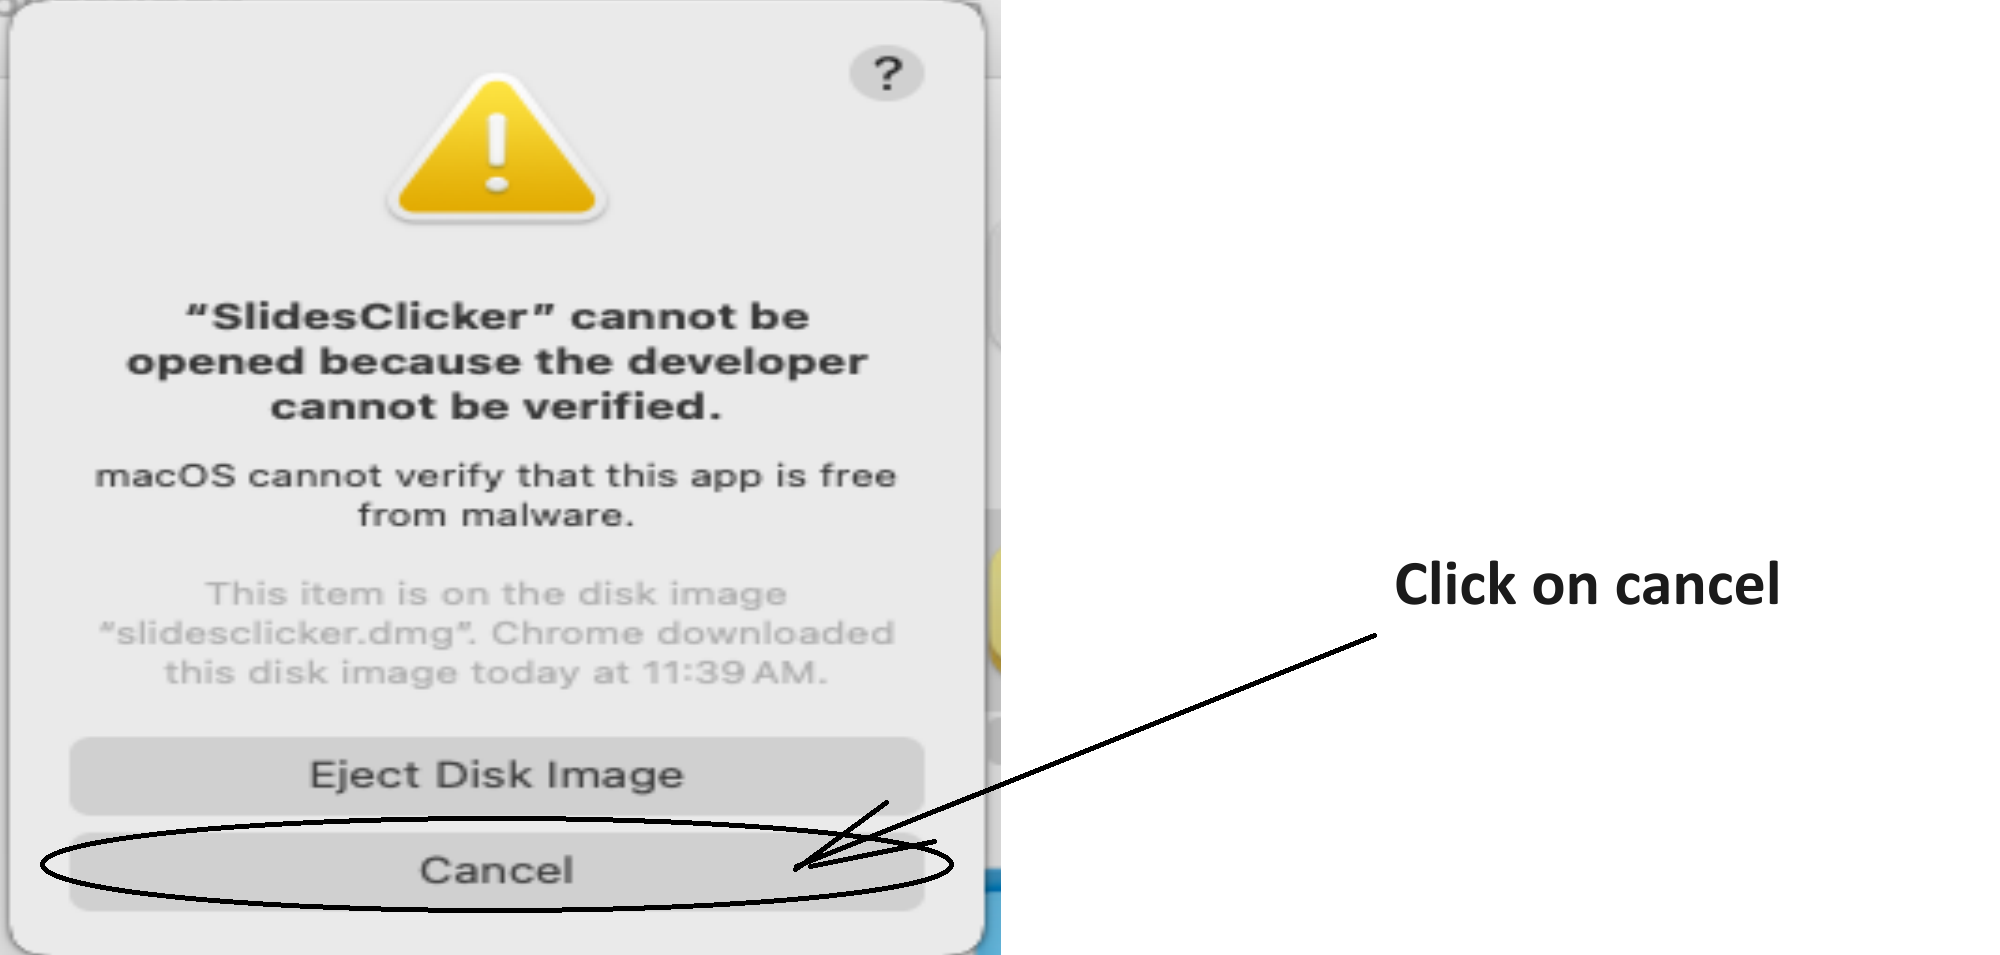
On new Mac OS like Mac 13 (Ventura) or 14 (Sonoma), the screens will look like below:
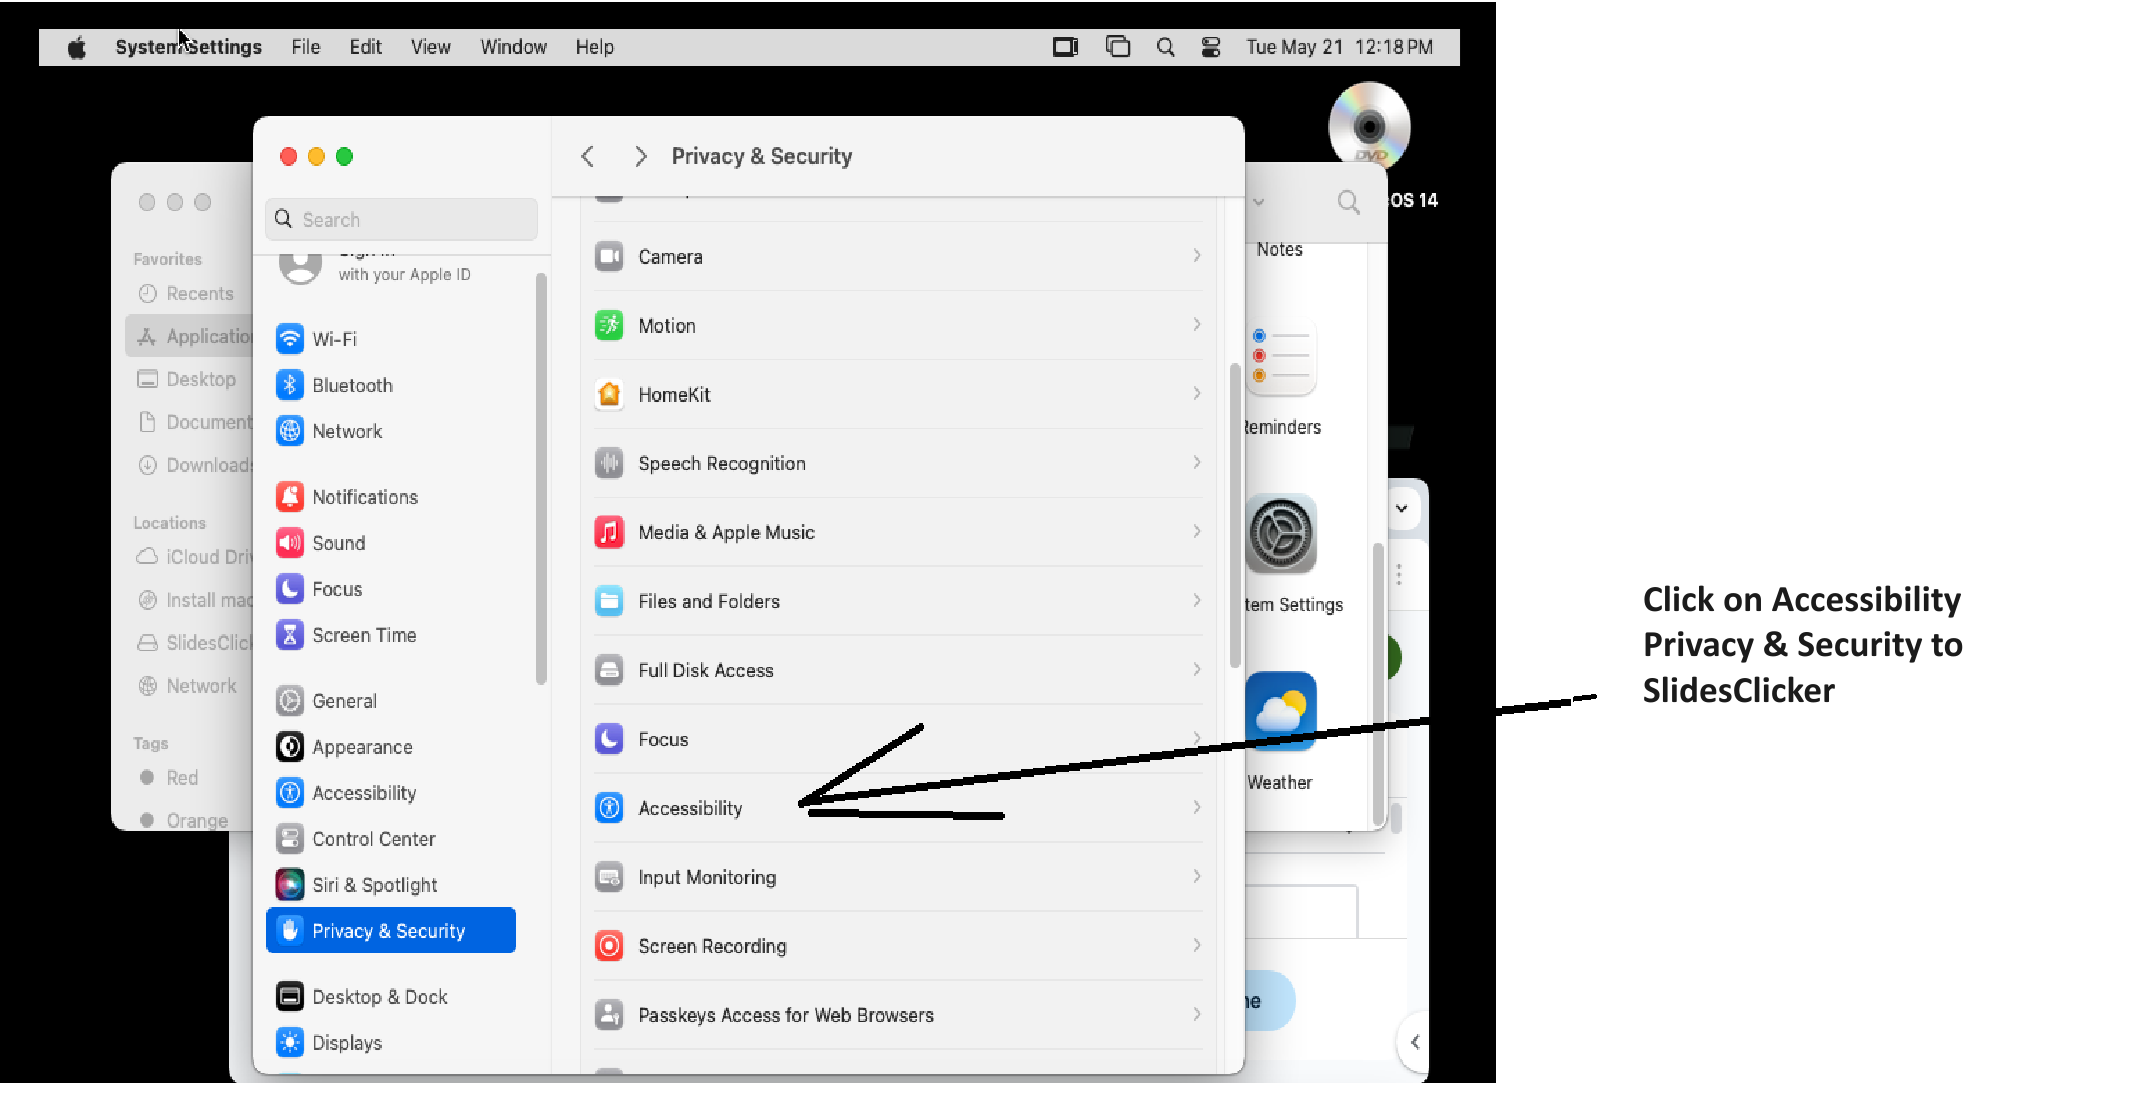
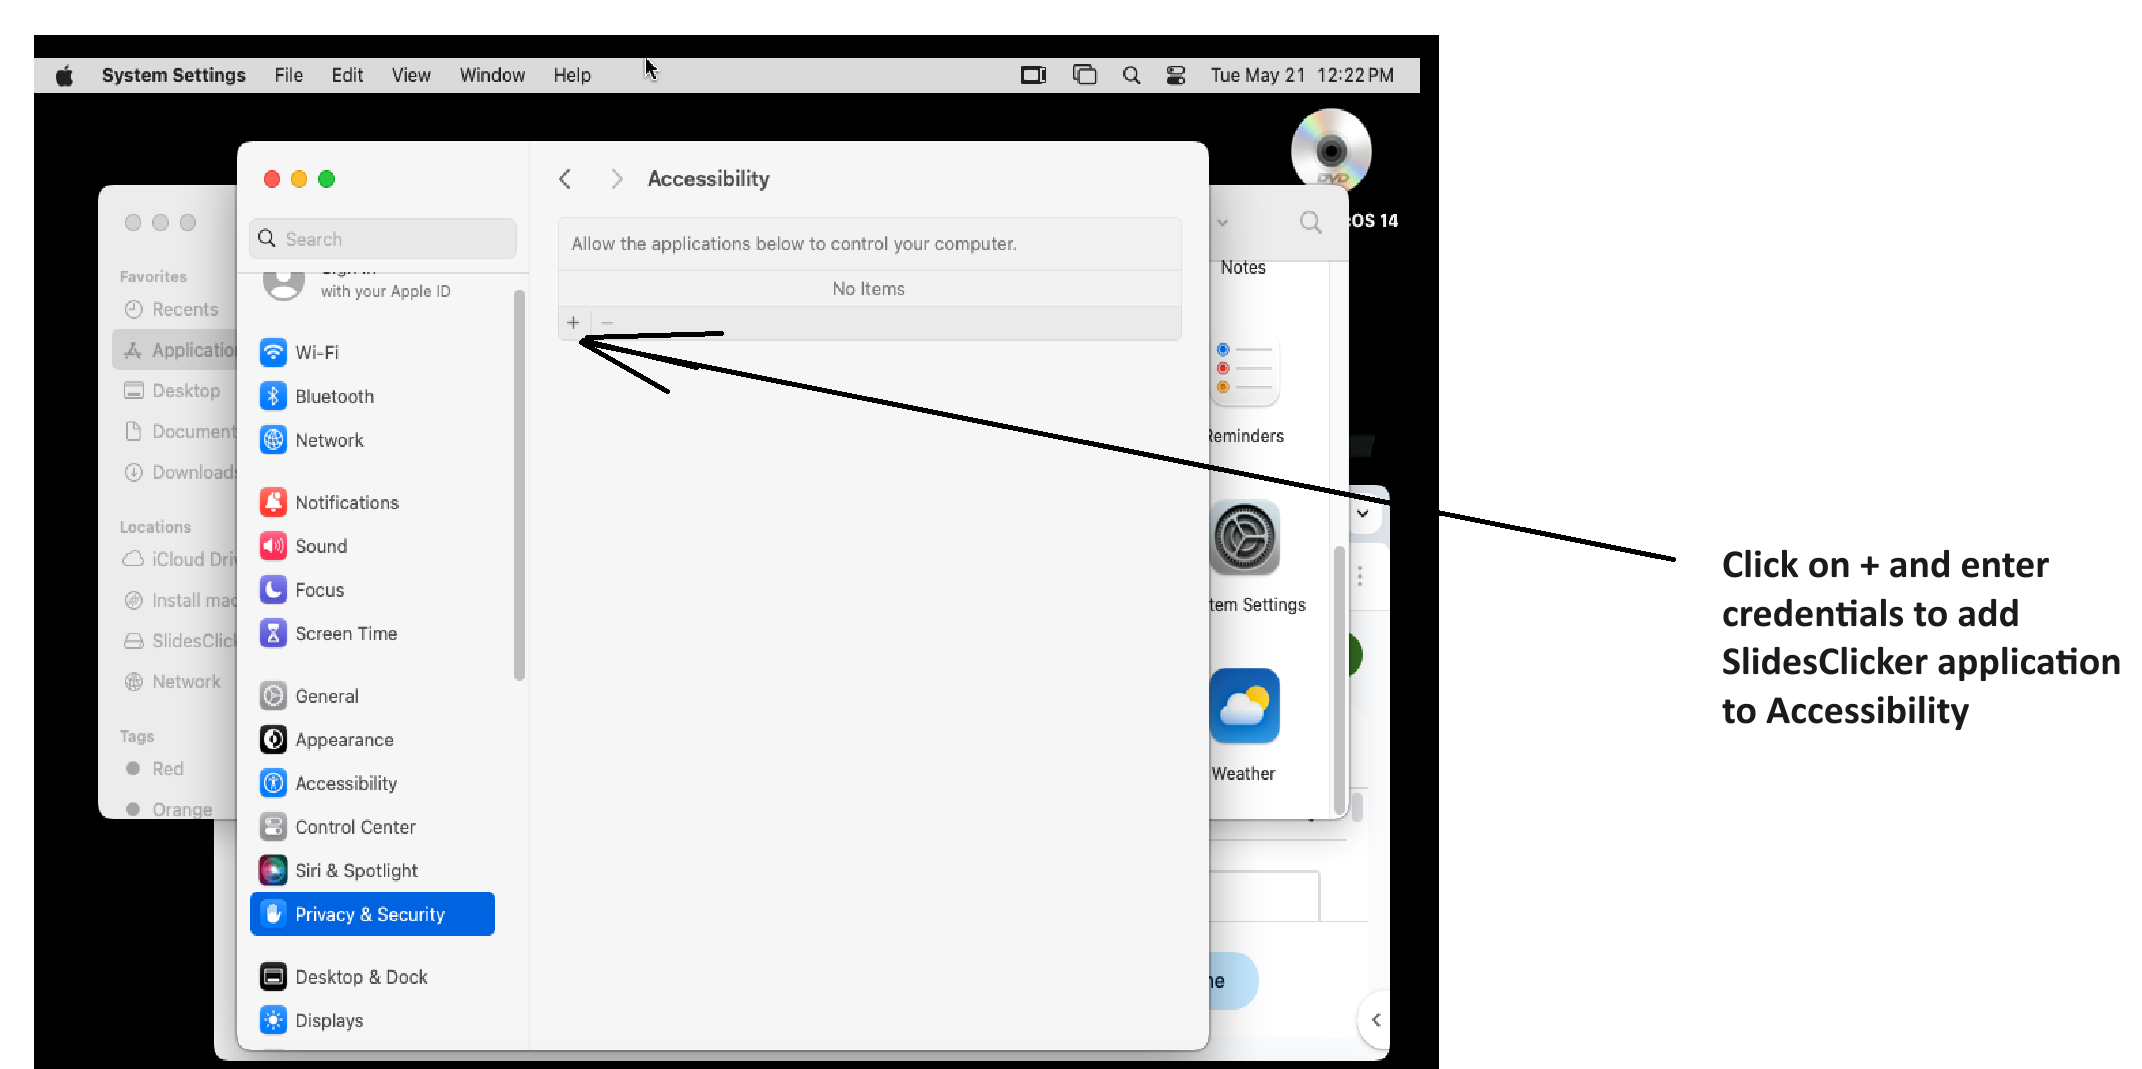
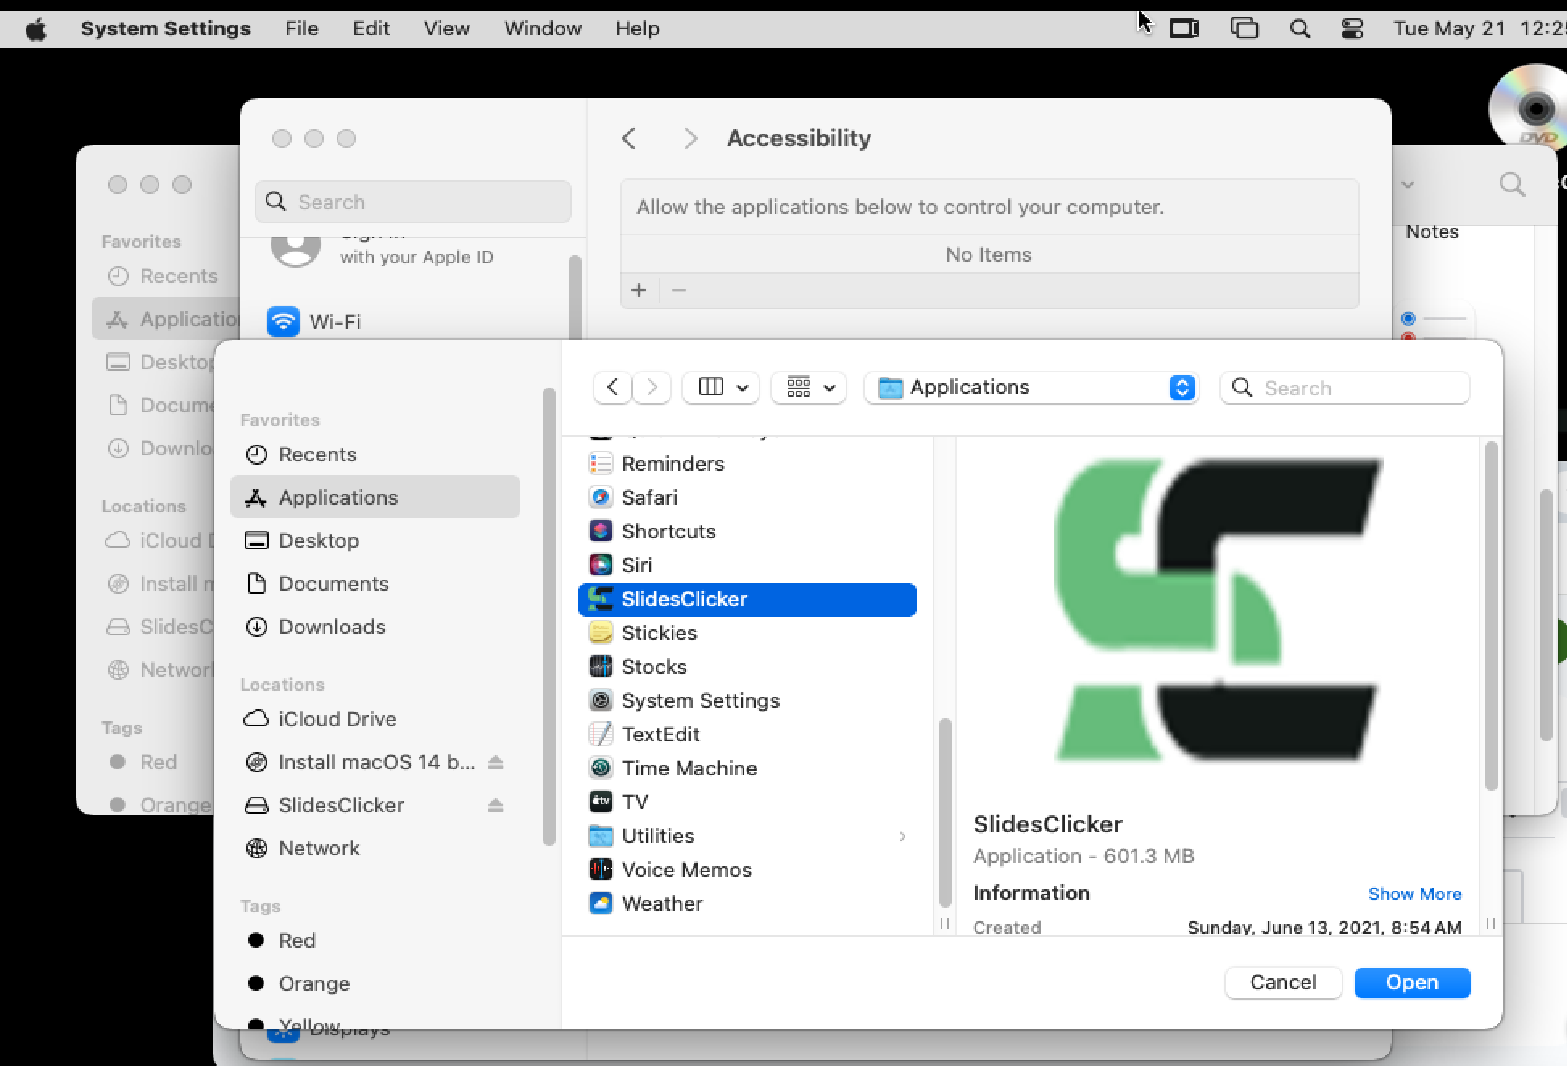
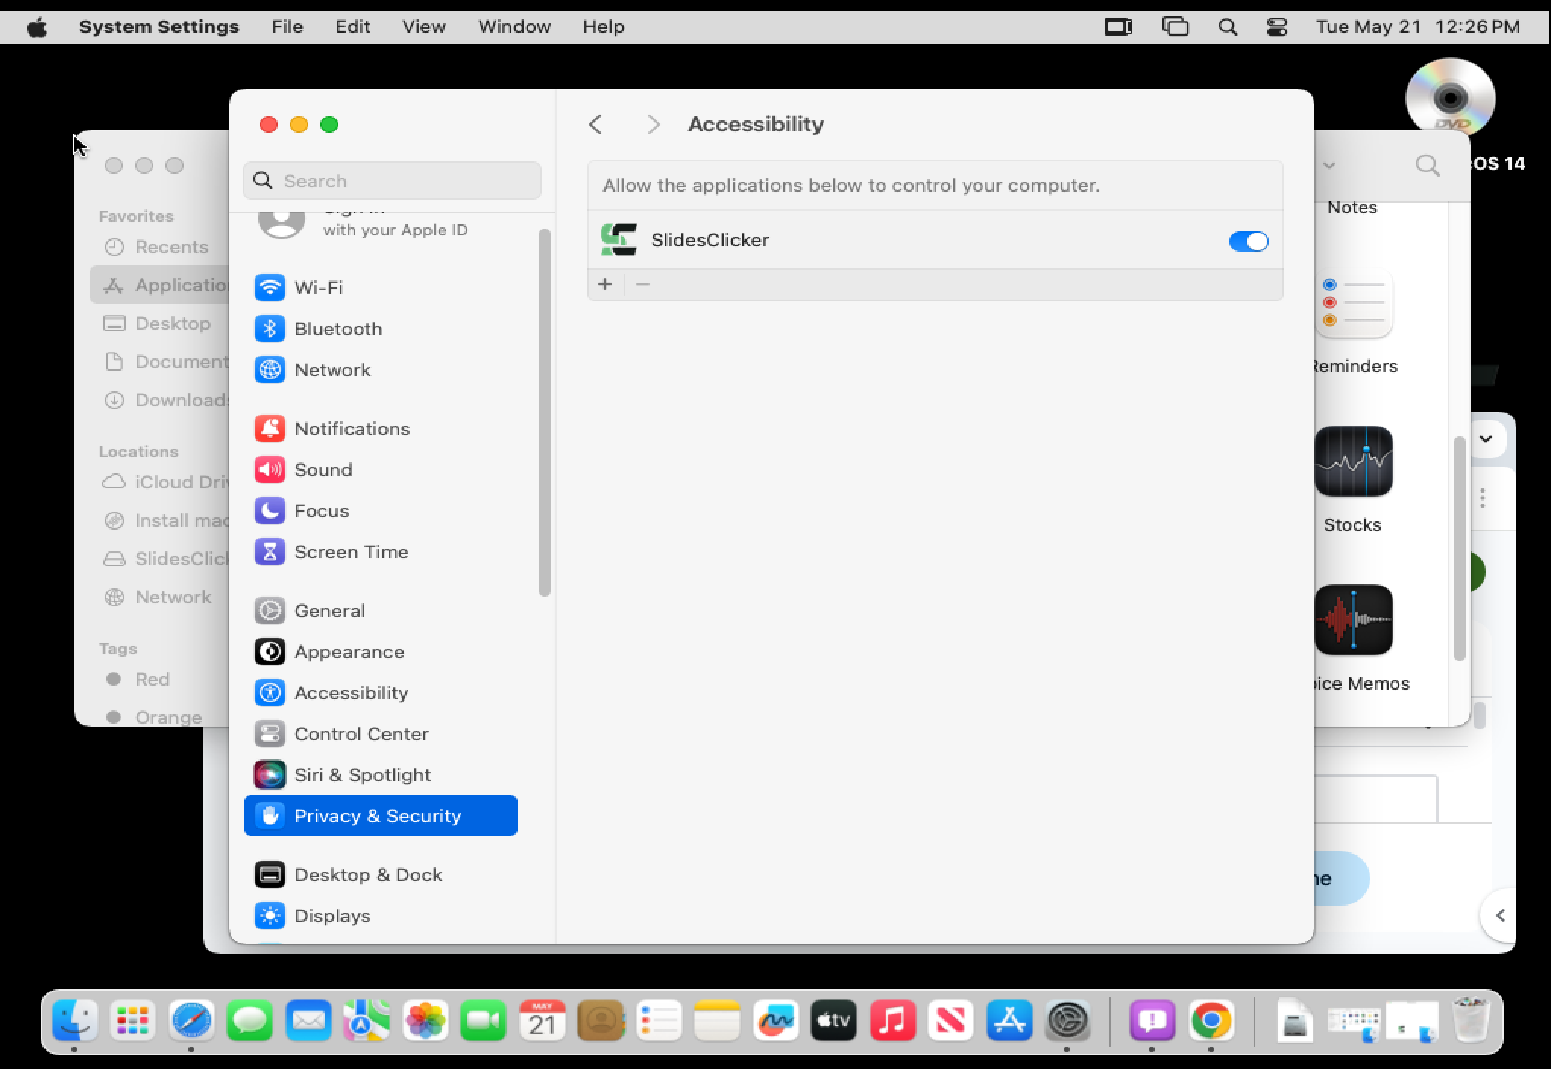
Step 3
Start using SlidesClicker
After installation completes, you will see a SlidesClicker icon on your desktop that you can click to open the application.You might need to do additional settings on Mac for things to work properly. Go to Mac Additional Settings to fix these.
You will need to have an have an account with SlidesClicker. Signup if you do not have an account already.
