Upgrading to new version on Windows
Upgrading to new version on Mac
New Installation - Windows/Mac
Upgrading to new version of SlidesClicker on Windows OS
Step 1
Download the SlidesClicker New Version
If you have not already, download SlidesClicker.Step 2
Remove the older version of SlidesClicker from your machone..
To remove go to "Add Remove Programs" and find "SlidesClicker" in the installed Apps & Features list and click on it to Uninstall. Do not Modify, Uninstall the version.Step 3
Install New Version SlidesClicker
After uninstallation is complete, install the new version. See steps here for installation on windows if you need help.You will need to have an have an account with SlidesClicker. Signup if you do not have an account already.
Upgrading to new version of SlidesClicker on Mac OS
Step 1
Stop the older version of installed SlidesClicker instance
If you have not already, stop the existing installed running instance(if any) of SlidesClicker, by clicking on Close (X) button on top left corner.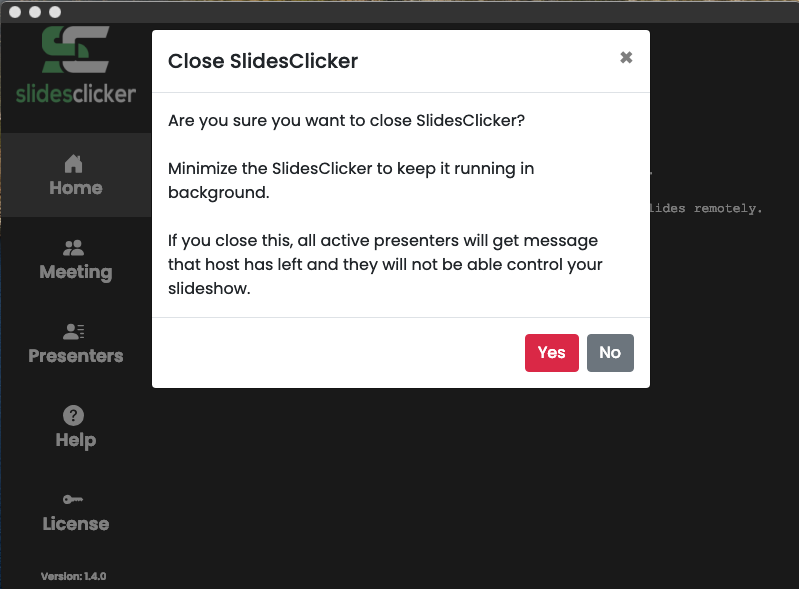
Step 2
Remove the older version of SlidesClicker from your machone..
To remove go to Applications & Move SlidesClicker to Trash.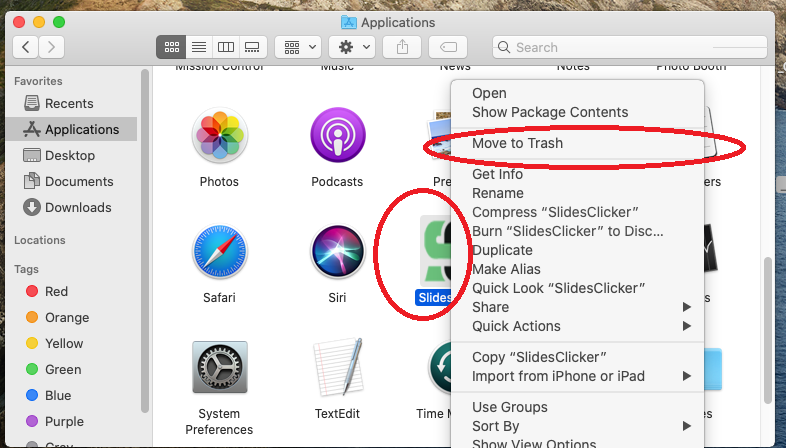
Step 3
Download the SlidesClicker dmg file
If you have not already, download SlidesClicker.Step 4
Start installation by double clicking on dmg file you downloaded.
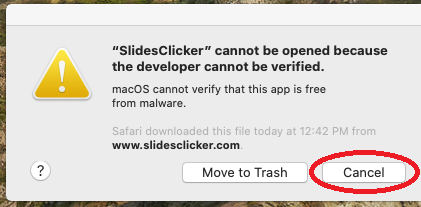
The dmg file will unpack to start the installation. In case the installation is blocked by a popup stating App is from an unidentified developer, you can close/cancel that (Do not click on Move to Trash) and go to Apple menu > System Preferences > Security & Privacy > > General and click on "Open Anyway" button as shown below.

Step 5
Removing older permissions and giving new permissions.
Step 5a
Since you are upgrading to new version of Slidesclicker, you will need to remove older version and add new version into Accessibility Permissions as shown in this image.You can do so by going to
Apple menu > System Preferences > Security & Privacy > Privacy > Accessibility. If you see SlidesClicker listed in apps, select SldiesClicker and - button to remove this. You might need to unlock to make these changes.
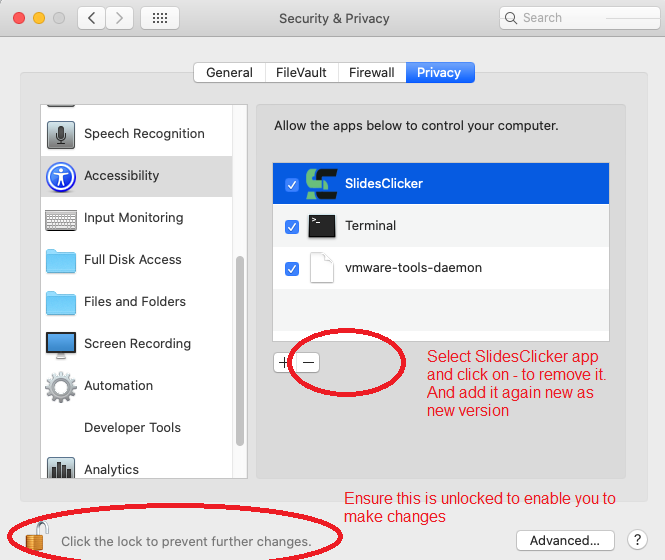
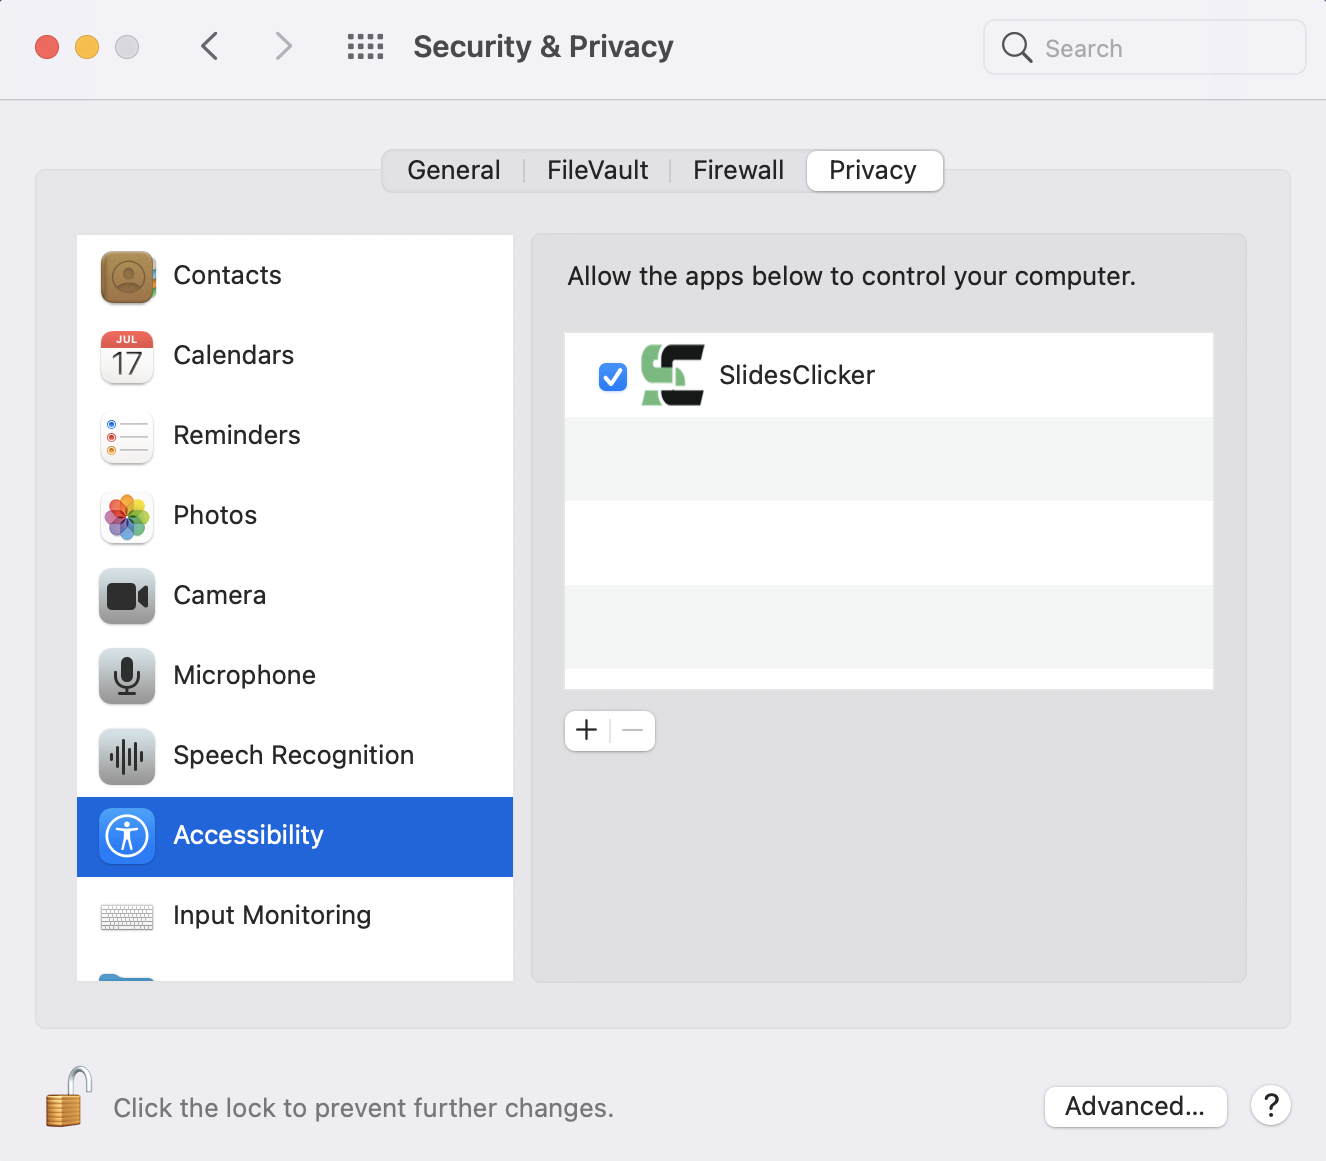
After you have done this, click on + button and select SldiesClicker from Applications (where you installed SlidesClicker), to add the new verson in now.
Step 5b
Set up Screen Recording Permissions in Security & Privacy (Only needed if you want to show slides to Presenters on Clicker)
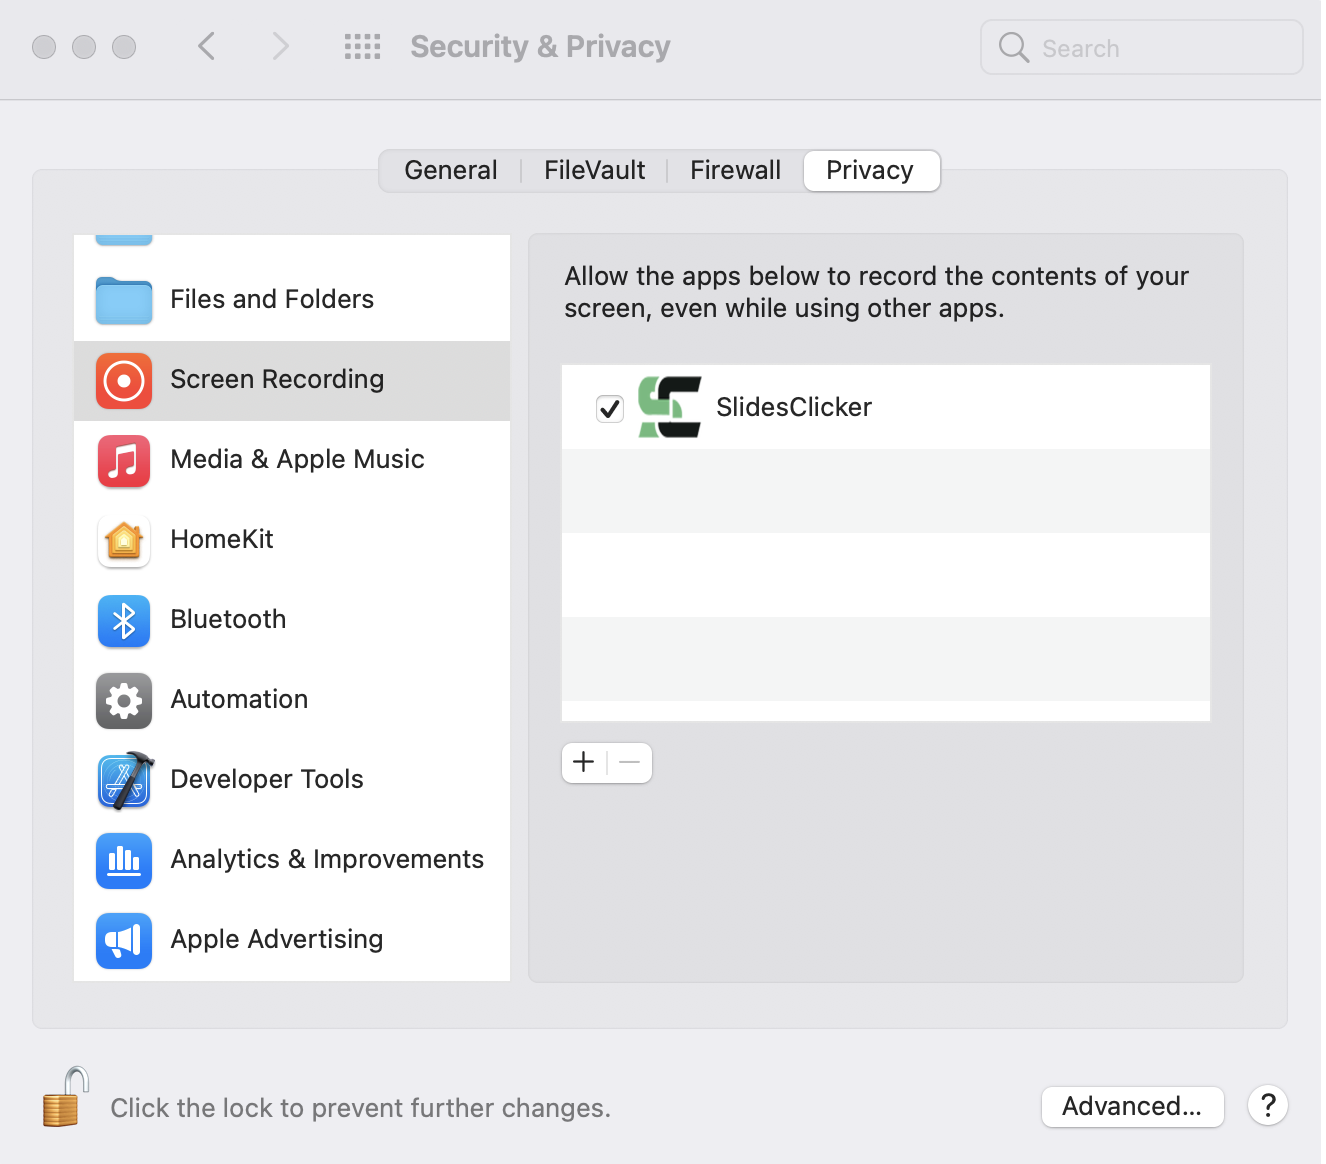
Allow SlidesClicker to share your desktop screens with Presenters. You only neeed to enable this if you are going to enable "Show Slides Screenshots to Presenters" Option in Meetings tab.Since you are upgrading to new version of Slidesclicker, you will need to remove older version and add new version into Screen Recording Permissions as shown in this image.
You can do so by going to
Apple menu > System Preferences > Security & Privacy > Privacy > Screen Recording. If SlidesClicker is already listed in apps, click the checkbox, else click on + button and select SldiesClicker from Applications (where you installed SlidesClicker).
Step 5c
Set up Automation Permissions in Security & Privacy
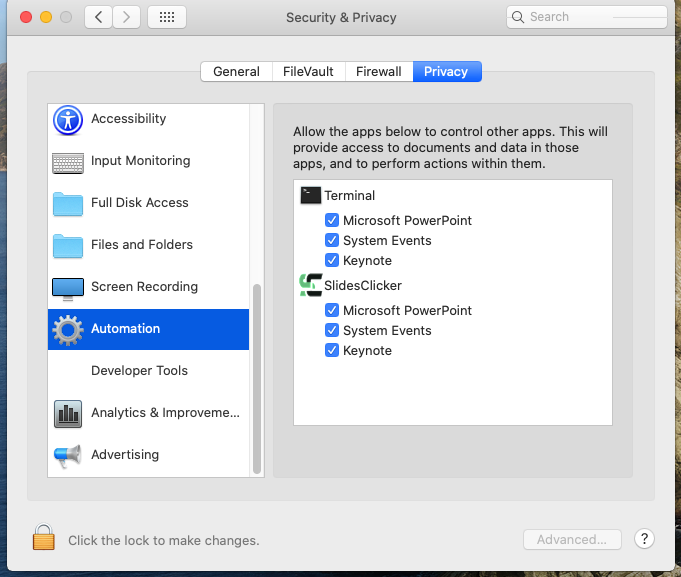
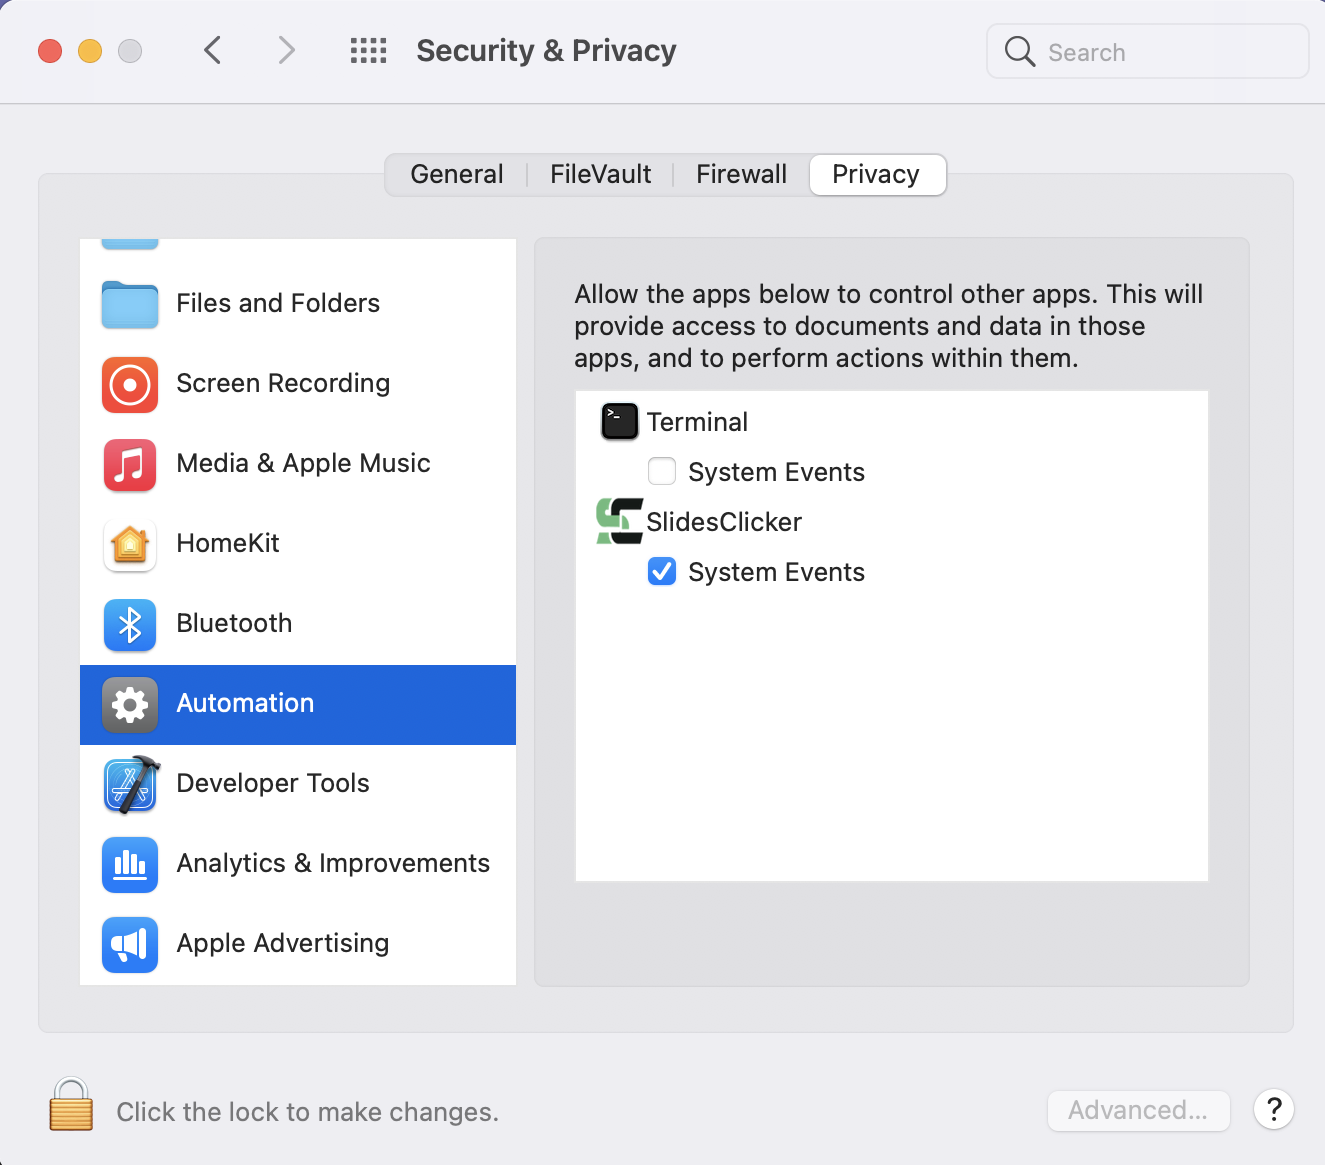
Allow SlidesClicker to control your slides in slideshow mode. This permission is in Automation.You can do so by going to
Apple menu > System Preferences > Security & Privacy > Privacy > Automation. SlidesClicker should be listed in apps, click the checkbox for SystemEvents.
Step 5d
Allow Events in Automation Permissions From Powerpoint & Keynote
Allow SlidesClicker to get permission to Microsoft Powerpoint & Apple Keynote. This permission is in Automation.You can do so by going to
Apple menu > System Preferences > Security & Privacy > Privacy > Automation. SlidesClicker along with System Events, Microsoft Powerpoint & Keynote should be listed in apps as shown below.
